Recent Posts

Is Dune Awakening an MMORPG? Explore the Details


Gamers worldwide are buzzing about Funcom’s latest release. Blending survival mechanics with massive multiplayer features, this title challenges traditional genre labels. Set in Frank Herbert’s iconic universe, it launched June 10, 2025, for Windows—with console versions arriving next year.

Over 140,000 players flooded Steam on day one, drawn by its unique approach. The experience revolves around four distinct phases: Survive, Protect, Expand, and Control. This structure creates dynamic gameplay where alliances shift like desert sands.

Reviews praise its 80/100 Metacritic score, highlighting how it merges resource management with large-scale cooperation. Veterans of survival titles and MMO fans alike find common ground here. The developers spent years perfecting this ambitious vision, balancing harsh environments with social strategy.

Rather than fitting neatly into existing categories, the project carves its own path. Teams collaborate to dominate territories while battling environmental threats. This fusion creates tension between individual survival and collective power struggles—a fresh take on multiplayer dynamics.

Key Takeaways

  • Combines survival mechanics with massive multiplayer elements
  • Attracted 140,000+ concurrent Steam players at launch
  • Features a unique four-phase progression system
  • Console versions planned for 2026 release
  • Balances solo challenges with team-based strategy
  • Earned an 80/100 Metacritic score from critics

Understanding Dune Awakening’s Core Gameplay and Genre

Funcom’s ambitious project reimagines survival gaming through the lens of a beloved sci-fi saga. Your journey begins with creating a customizable character whose capabilities hinge on mentor selection. Choose a Bene Gesserit advisor to unlock psychological warfare tactics, or pick other factions for distinct survival advantages.

Survival Elements and Open World Exploration

Arrakis tests players with twin threats: environmental hazards and political chaos. Daylight brings scorching heat requiring stillsuits maintenance, while nights host deadly Sardaukar raids. The open world demands constant adaptation – navigate quicksand pits during sandstorms or risk becoming worm food.

Movement itself becomes strategic. Sprinting attracts sandworms, forcing careful route planning. Resource management goes beyond typical survival games: harvest spice carefully, as glittering deposits often conceal lurking dangers.

Influences from Classic Lore

The awakening of Arrakis occurs in an alternate reality where key figures never existed. With Fremen mysteriously absent, players fill the power vacuum between warring houses. Lore enthusiasts will spot subtle nods: Bene Gesserit abilities mirror Frank Herbert’s original concepts, while spice hallucinations recreate iconic visions.

Environmental storytelling shines through details like crumbling Harkonnen outposts and abandoned desert sietches. These elements ground the experience in familiar mythology while offering fresh perspectives for newcomers.

Is Dune Awakening an mmorpg: A Deep Dive into Multiplayer Features

Political intrigue meets environmental chaos in this ambitious title’s shared-world design. The Deep Deserts zone hosts hundreds of combatants clashing over spice fields and ancient relics. Weekly Coriolis storms reshape terrain, forcing constant tactical adjustments during faction wars.

Dune Awakening multiplayer factions

Faction Warfare in Shifting Sands

Choosing between House Atreides or Harkonnen unlocks exclusive story missions and NPC alliances. Atreides loyalists gain access to sonic weapon prototypes, while Harkonnen supporters master brutal close-quarters tactics. These choices ripple through server-wide conflicts, affecting resource distribution across regions.

Coriolis events temporarily expose buried fremen tech, sparking frenzied battles between organized groups. Storms also create new choke points perfect for ambushing rival caravans. Survival here demands quick thinking – and quicker trigger fingers.

Guilds Shaping the Political Landscape

Powerful alliances compete for seats in the Landsraad council, voting on server-wide policies. Successful guilds can tax spice routes or declare ceasefire periods through this system. Major decisions trigger permanent map changes, like Harkonnen-controlled territories gaining automated defense turrets.

Funcom’s experience with Conan Exiles shines through territory control mechanics. However, the political layer adds unprecedented depth. Your guild’s reputation directly impacts recruitment and trade opportunities with neutral factions.

Genre-Defying Design Choices

The Overland flight system bridges solo and group play seamlessly. Piloting ornithopters provides strategic overviews before plunging into chaotic ground battles. This approach blends survival tension from Conan Exiles with MMO-scale warfare seen in larger titles.

Unlike traditional roleplaying games, progression ties closely to environmental mastery. Learning storm patterns becomes as crucial as combat skills. This fusion creates a fresh experience that rewards both individual cunning and coordinated teamwork.

Survival Mechanics, Crafting, and Environmental Challenges

Arrakis demands more than combat skills—it requires smart planning against relentless threats. Every decision carries weight, from shelter placement to spice harvesting routes. The survival game elements push players to balance immediate needs with long-term goals.

Resource Management and Base Building

Gathering materials starts simple: scrap metal for knives, plant fibers for makeshift clothes. But the Emperor’s tax system complicates expansion—build too much, and your base becomes a financial burden. Smart builders use modular designs, upgrading shelters into fortified compounds as resources allow.

Spice fields become battlegrounds. Harvesting this glowing resource grants temporary powers but risks addiction. Teams guarding vehicle convoys face ambushes from rivals and sandworm attacks. Lose a transport to the worms? That gear’s gone forever—a harsh penalty pushing cautious strategies.

Underground labs offer respite from surface dangers. These dungeon-like spaces challenge solo explorers with environmental puzzles. Groups can tackle larger chambers, unlocking rare blueprints for storm-resistant gear. Each success makes surviving the next storms easier.

From basic tools to ornithopter parts, crafting ties progression to environmental mastery. The cycle stays fresh: risk expeditions for better gear, outsmart enemies, then push further into unmapped zones. It’s a tense dance where every scrap of material matters.

Conclusion

Six years of collaboration between Funcom and Legendary Entertainment have forged a genre-defying experience. This game masterfully transitions from harsh solo survival to intricate faction politics, rewarding both playstyles equally. Early adopters praise how personal character growth feeds into server-wide power struggles.

The world evolves through player actions – guilds reshaping the map via Landsraad decisions, while sandworms patrol contested spice fields. Survival mechanics ground the multiplayer chaos, creating stakes rare in shared-world titles. Choices matter: ally with Bene Gesserit manipulators or crush enemies as a Harkonnen warlord.

Fans of strategic base-building find depth in modular outposts, while political schemers thrive in territory wars. Weekly storms refresh objectives, ensuring no two play sessions repeat. With planned updates expanding this universe, the game promises fresh challenges beyond launch.

Ultimately, this hybrid approach bridges gaming communities. Whether battling faction rivals or mastering desert navigation, players craft their own path. Ready to leave footprints on Arrakis’ ever-changing sands?

FAQ

How does multiplayer work in this desert survival experience?

Team up or compete with hundreds of players on shared servers. Join factions like the Landsraad or Bene Gesserit to control spice resources, build shelters, and survive deadly sandstorms together.

Can I play solo against environmental threats?

Yes! While designed for faction warfare, you can tackle Arrakis alone. Craft stillsuits, outsmart sandworms, and scavenge wrecked ornithopters—but expect tougher challenges without allies.

What makes the open world dangerous beyond enemy factions?

Dynamic sandstorms reshape the map, destroying bases. Sandworms hunt vibrations, while spice addiction risks alter gameplay. Survival requires adapting to the planet’s brutal rules.

How does base-building compare to games like Conan Exiles?

Similar deep crafting but with Dune twists. Use salvaged vehicle parts for shelters, harvest water from bodies, and reinforce structures against Coriolis winds. Territory control impacts spice trade routes.

Are there PvE raids or endgame threats?

Sandworms become raid bosses—lure them toward enemy bases. Late-game challenges include securing sietches, surviving solar flares, and navigating shifting political alliances between major houses.

Will vehicles like ornithopters change exploration?

Absolutely. These aircraft let you bypass worm zones and scout for spice blows. However, fuel costs and radar signatures make every flight a risk-reward calculation.

How does the faction reputation system work?

Your choices with groups like the Fremen or Spacing Guild unlock unique tech trees. Betray allies for rare blueprints, but face permanent hostility—servers remember your deeds.

What survival mechanics punish unprepared players?

Fail to maintain your stillsuit? Dehydration drains health. Ignore thermal protection? Heatstroke impairs vision. Every system interconnects—even your base’s orientation matters during storms.

Is there permadeath for characters?

No full permadeath, but dying erases carried resources. Your faction can recover your water rings if they reach your body before worms do—adding high-stakes retrieval missions.

How large are servers at launch?

While Funcom hasn’t confirmed numbers, early tests suggest hundreds per shard. The map scales dynamically—more players in a region spawn bigger spice blows… and worm attention.

Locate the 8th Trial in Dune Awakening


Mastering the final challenge in Dune Awakening requires skill, strategy, and precise navigation. This essential trial marks the climax of the Fremen questline, testing players’ combat abilities and puzzle-solving expertise. Hidden within the Eastern Shield Wall’s rugged terrain, the journey demands careful preparation and sharp instincts.

Known as “The Footsteps of the Fremen”, this mission lies north of Mysa Tarill. Look for a distinctive blue marker etched into the canyon’s left wall—your gateway to the trial’s intricate challenges. Unlike earlier stages, success here hinges on balancing resource management with quick thinking during enemy encounters.

Prepare thoroughly before approaching. Stockpile ammunition, healing items, and extra water to survive the harsh environment. The rewards justify the effort: exclusive schematics like the Freman Deathstill and Ari’s Pistol await those who conquer this ultimate test.

Key Takeaways

  • Final trial located in Eastern Shield Wall near Mysa Tarill
  • Requires solving multi-layered puzzles and combat scenarios
  • Critical preparation includes water, ammo, and healing supplies
  • Offers rare gear blueprints for long-term progression
  • Central to understanding Fremen history and game lore

Understanding Dune: Awakening and Its Trials

Dune: Awakening transforms survival into art through its Trials of Aql—eight hidden missions blending combat, exploration, and Fremen wisdom. These challenges aren’t just side activities; they’re the backbone of understanding Arrakis’ deadliest secrets while earning game-changing gear.

Overview of the Trials of Aql

The Trials of Aql act as Arrakis’ ultimate survival school. Each trial unlocks at specific Aql Altars scattered across the desert, testing skills like spice harvesting and sandworm evasion. Your first mandatory trial arrives during the “Echoes from the Past” story mission, teaching water conservation through the Scavenger Stillsuit blueprint.

The Role of Trials in Game Progression

Completing trials rewards schematics that evolve with your progress. Early stages grant basic survival tools, while later ones unlock advanced tech like the Freman Deathstill—a device critical for end-game spice processing. The table below shows how trial rewards scale:

Trial Stage Key Challenge Blueprint Reward
1-3 Water management Scavenger Stillsuit
4-6 Combat tactics Crysknife Prototype
7-8 Spice refinement Freman Deathstill

These missions push players into high-risk zones near sandworm territories, where water drains 40% faster. Succeeding here doesn’t just upgrade your gear—it reveals how the Fremen thrived in this hostile ecosystem for millennia.

Navigating Arrakis: Essential Game Mechanics

Surviving Arrakis demands more than combat skills—it requires mastering its navigation systems. The Journey menu serves as your lifeline in this unforgiving desert, blending traditional gaming interfaces with environmental storytelling. Let’s break down the tools that’ll keep you oriented when every dune looks identical.

quest indicators in desert area

Utilizing the Journey Menu

Access trial locations through the “Find the Fremen” tab in your Journey menu. Selecting “View Trial Location” displays a snapshot of the target area—maybe a rock formation or ancient ruins. Unlike typical games, you won’t get GPS coordinates. Instead, match these images to real terrain like a Fremen scout.

Interpreting Quest Indicators and Symbols

Look for the glowing blue Eye symbol near trial entrances. These markers blend into cliff faces or abandoned structures. Environmental cues matter too—unusual shadows or wind patterns often hint at hidden paths. Watch your equipment load: heavy packs slow movement, making sandworm encounters riskier.

Navigation Tool Purpose Survival Impact
Journey Screenshots Identify trial zones High (prevents wandering)
Blue Eye Symbols Mark entry points Critical (avoids missed trials)
Sand Movement Indicates worm activity Essential (prevents deaths)

Smart explorers study landmark clusters. Three spires? That’s the Crimson Pass. A collapsed observatory? You’re near Trial #5. Pack extra water filters—detours are common when avoiding worm zones. Remember: The desert rewards those who read its subtle language.

Where Do I Find the 8th Trial in Dune Awakening

The path to the final Fremen challenge lies hidden within Arrakis’ most iconic landmark. To conquer this pinnacle test, you’ll need sharp observation skills and a survivalist’s mindset.

Identifying the Eastern Shield Wall

North of Mysa Tarill, the Eastern Shield Wall rises like a colossal sandstone fortress. Its layered cliffs glow amber at dawn—a helpful visual marker when approaching from southern routes. Seasoned players recommend scouting this location during midday when shadows shrink, revealing hidden crevices.

Two primary paths lead here. The northern route involves scaling treacherous cliffs, while southern approaches add 15 minutes to your journey but reduce fall risks. Watch for rock formations resembling stacked plates—these signal you’re 200 meters from the trial’s starting zone.

Recognizing the Blue Symbol and Entrance

The entrance hides behind a weather-worn archway on the wall’s left flank. Look for a cobalt-blue Fremen glyph etched into stone at chest height—it shimmers faintly under direct sunlight. This symbol marks access to Sietch Ta’lab, where the eighth trial unfolds.

Timing matters. Sandstorms can obscure the marker, so check your in-game weather tracker before departing. Once inside, there’s no turning back: stockpile at least 3 water canisters and repair kits. The trial’s elaborate design reflects its status as Arrakis’ ultimate survival exam—come ready to earn your place in Fremen history.

Exploring Previous Trials for Valuable Insights

Arrakis’ earlier trials aren’t just checkpoints—they’re masterclasses in desert survival. Each trial AQL location builds critical skills through unique environmental storytelling and escalating challenges. Let’s map their strategic value.

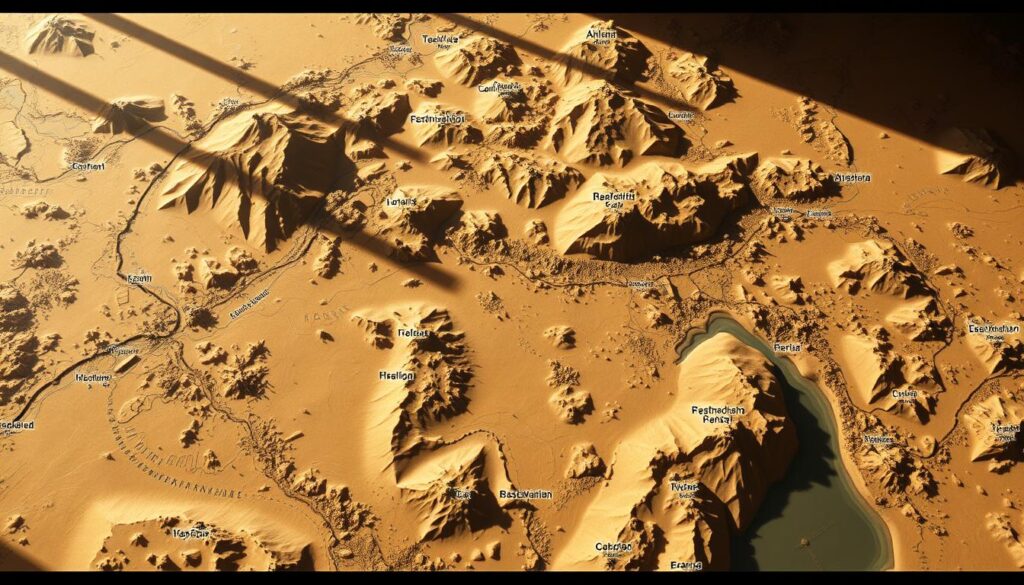
Trial AQL locations map

Recap of Notable Trial Locations

The first trial in Mihna Cavern (Hagga Basin South) teaches stealth through shadow-dodging mechanics. Head east to the second trial AQL in Deep Struggle—a maze-like canyon in Eastern Vermillius Gap filled with pressure plate traps. This area demands careful footwork that preps players for later sandworm evasion.

Later challenges shift focus. The seventh trial AQL in Red Maw (Hagga Rift) combines vertical climbing with timed water conservation. Western Vermillius Gap’s third trial introduces spice harvesting under enemy patrols—a skill vital for endgame crafting.

Lessons from Earlier Challenges

Combat trials like Hollow Hammer drill weapon-switching tactics against armored Sardaukar troops. These encounters teach ammo conservation strategies crucial for the final trial’s marathon battles. The Devil’s Eye Cavern’s sixth trial reinforces thermal management—ignore those cracked coolant pipes at your peril.

Rewards tell their own story. Early blueprints like the Scavenger Stillsuit from Trial 1 become building blocks for advanced gear. The Static Compactor from Trial 4 transforms spice processing efficiency, while the Thumper from Trial 5 remains essential for worm-free exploration.

Essential Tips and Equipment for the Final Test

Conquering Arrakis’ ultimate challenge demands meticulous planning. The eighth trial AQL pushes players to their limits with multi-stage puzzles and relentless enemies in claustrophobic underground corridors. Success hinges on balancing survival instincts with strategic resource allocation.

Recommended Gear and Supplies

Pack twice the water you’d carry for earlier trials—underground routes block natural replenishment. Prioritize armor-piercing weapons and at least 150 rounds of ammunition for prolonged firefights. Healing kits prove vital: carry six standard medpacks or three advanced versions to offset trap damage and enemy strikes.

Strategies for Solving In-Game Puzzles

The door lock mechanism tests knowledge of Dune lore—memorize planetary names like Kaitain and Salusa Secundus beforehand. For the ecology puzzle, watch wall carvings depicting Arrakis’ native species. The Deathstill sequence requires aligning ancient symbols in this order: sandworm, spice bloom, and water droplet.

Managing Combat Encounters Effectively

Close-quarters battles favor shotguns and melee weapons over sniper rifles. Use narrow corridors to funnel enemies into chokepoints—throw grenades when groups cluster. Conserve ammo by aiming for helmet weak spots on armored foes. Always retreat to defensible positions after solving puzzles to reset enemy spawns.

Establish a nearby base with extra supplies before entering. Once started, the trial locks fast-travel options—ensure you’re fully equipped. Remember: patience trumps haste in this grueling test of Fremen mastery.

Step-by-Step Guide to Entering the Eighth Trial

Reaching the final challenge requires more than courage—it demands precision navigation across Arrakis’ deadliest terrain. The northern route to the Eastern Shield Wall tests even veteran players with crumbling cliffs and deceptive pathways. Approach during daylight hours for optimal visibility.

Mastering the Northern Descent

Scout the cliff’s edge for natural ledges resembling stair steps. These provide safe footholds when descending. Time jumps between platforms carefully—wait for wind gusts to subside. Sandy patches below reduce fall damage if missteps occur.

Securing Entry Safely

The cobalt-blue symbol marking the entrance appears on the wall’s left side. Circle the area counterclockwise if initially missed—perspective shifts reveal hidden details. Once inside, follow corridors downward into the depths. Turn right after passing three arched doorways to reach the main chamber.

Watch for carved arrows in stone floors guiding toward puzzle rooms. Avoid triggering loose rocks near staircases—they alert enemies. With patience and sharp observation, you’ll unlock Arrakis’ most rewarding survival challenge.

FAQ

How do Trials of Aql affect my progression in Dune: Awakening?

Trials of Aql unlock critical story paths and gear upgrades. Completing them grants access to new areas like the Hagga Basin and Vermillius Gap, which are essential for mastering Arrakis’ challenges.

What symbols mark the entrance to the eighth trial near the shield wall?

Look for blue geometric patterns carved into rock formations east of the shield wall. These symbols glow faintly at night, guiding you to a hidden door beneath the Vermillius Gap cliffs.

Can earlier trials help prepare for the final test?

Yes! The sixth trial’s spice mechanics and seventh trial’s puzzle-solving teach vital skills. Mastering water conservation in the Hagga Basin also helps survive the eighth trial’s harsh desert conditions.

What gear is recommended for combat in later trials?

Carry a crysknife for close-quarters fights and a stillsuit upgraded with filtration mods. Stun grenades work well against sandworms, while a compact thumper helps distract enemies during stealth sections.

How do I avoid getting lost near the Eastern Shield Wall?

Use the Journey Menu’s 3D compass and watch for rust-colored rock pillars. The correct path slopes downward just north of a collapsed spice harvester wreckage – save often to backtrack if needed.

Are there time-sensitive elements in the eighth trial’s puzzles?

Yes. One chamber requires aligning solar mirrors before midday sun passes. Listen for audio cues like shifting sand – they often hint at hidden pressure plates or approaching threats.

What’s the safest route through the Vermillius Gap cliffs?

Stick to the eastern ridge and watch for glowing fungal growths. These bioluminescent markers indicate stable footing. Avoid the western crevasses – they’re prone to sudden sandslides.

Mastering New Skills in Dune Awakening: A Beginner’s Guide


Surviving Arrakis demands more than quick reflexes or sharp instincts. The desert planet tests your ability to adapt through its deep progression mechanics, where every choice shapes your journey. Dune Awakening stands apart by letting players blend combat expertise with political strategy, creating a sandbox of possibilities for character growth.

Your adventure begins with selecting a starting class, but the system doesn’t lock you into rigid roles. Want to combine stealth tactics with resource management? The game rewards creative hybrid builds that reflect your playstyle. Trainers hidden in spice-rich regions offer advanced techniques, turning novices into formidable desert operatives.

New players often underestimate the importance of balancing combat abilities with survival traits. Prioritizing one area leaves gaps that Arrakis’ dangers will exploit. This guide reveals methods to avoid early pitfalls while maximizing your potential across multiple skill trees.

Key Takeaways

  • Arrakis survival depends on strategic skill combinations, not just combat prowess
  • The progression system allows flexible hybrid builds beyond traditional class roles
  • Starting class choice impacts early-game strategies but doesn’t limit late-game options
  • Resource allocation mistakes can create vulnerabilities in harsh environments
  • Specialized trainers unlock high-tier abilities critical for endgame content
  • Successful builds balance combat, survival, and faction-specific capabilities

Introduction to Dune Awakening and Its Unique Skill System

Arrakis isn’t just a desert—it’s a crucible that forges adaptable survivors through dynamic mechanics. Dune Awakening redefines survival MMOs by merging political intrigue with sandworm-ridden wastelands, where every action reshapes your capabilities.

The World of Arrakis and Gameplay Dynamics

This persistent world thrives on tension. Thousands battle for spice while navigating deadly storms and rival factions. Unlike traditional RPGs, your starting class merely sketches your initial strengths—not your destiny.

Combat expertise might secure a outpost, but survival traits keep you alive during sandstorms. Stealth abilities become vital when infiltrating enemy harvesters. The environment constantly demands shifting strategies, rewarding those who diversify their toolkit.

Why Skill Mastery Matters for Beginners

Early specialization creates vulnerabilities. A Trooper focused solely on firearms might starve during resource droughts. A Mentat ignoring combat becomes easy prey for raiders.

Smart allocation unlocks synergies between trees. Pairing reconnaissance techniques with trap-setting creates ambush opportunities. Combining diplomacy skills with terrain knowledge helps secure rare materials from neutral factions.

Your choices ripple through the server’s evolving meta. Guilds scout members based on versatile builds that adapt to spice wars or base defense scenarios. Mastery isn’t about perfection—it’s about preparing for Arrakis’ endless curveballs.

Understanding the Intricate Skill Trees and Class Options

Dune Awakening’s progression system thrives on meaningful choices, where every class offers unique pathways through Arrakis’ dangers. The four core archetypes – Bene Gesserit, Mentat, Swordmaster, and Trooper – aren’t just combat roles but philosophical approaches to survival.

Exploring Class Roles: Bene Gesserit, Mentat, Swordmaster, and Trooper

Bene Gesserit abilities turn whispers into weapons. Their Voice technique manipulates foes, while reflex upgrades let them vanish from danger. Perfect for players who enjoy outsmarting enemies rather than overpowering them.

Swordmasters dance through battles with blade-focused skill trees. Parry mechanics and whirlwind strikes reward timing-focused players. They’re mobile artists who control engagements through precise positioning.

Mentats analyze like human supercomputers. Their recon tools map enemy movements, and predictive targeting helps allies land perfect shots. These strategists shine in group operations where information wins wars.

Troopers dominate with explosive force. Their abilities include rocket barrages and automated turrets, ideal for holding key positions. They turn spice fields into kill zones through sheer firepower.

“A warrior’s strength flows from their philosophy – the blade, the mind, the voice, or the gun.”

While classes start specialized, late-game flexibility lets players blend techniques. Imagine a Trooper planting bombs while using Mentat calculations to predict patrol routes. This fusion creates truly unique desert survivors.

How to learn new skills in dune awakening

Progress in Dune Awakening isn’t linear—it’s a strategic dance between survival and ambition. Your journey through the skill system begins with three core currencies: experience, reputation, and spice. Each completed mission or discovered landmark feeds your progression meter, rewarding points that unlock foundational class skill nodes.

Dune Awakening hybrid skill builds

Strategic Point Allocation Methods

Early game decisions ripple through late-game possibilities. Focus first on abilities that address immediate threats—sandstorm resistance or basic weapon handling. Save 30% of points for mid-game when hybrid options emerge. Prerequisite nodes often hide behind deceptively simple upgrades, so study branching paths carefully.

Advanced techniques demand more than points. A Bene Gesserit’s Truthsaying requires delivering water to Fremen tribes. Trooper rocket systems need salvaged Harkonnen tech. These challenges turn skill acquisition into world-shaping adventures.

Crafting Synergistic Builds

The desert rewards those who blend disciplines. Pair a Swordmaster’s evasion techniques with Mentat threat prediction to create a dodging tactician. Combine Trooper explosives with Bene Gesserit crowd control for area denial mastery.

“A blade alone cuts flesh. A blade guided by calculation severs fate.” – Imperial Weapons Master

Successful hybrids balance three elements: mobility, survivability, and threat output. Allocate 40% of points to primary class skills, 30% to complementary abilities, and 30% to universal survival traits. This ratio keeps builds focused while allowing creative counterplays against Arrakis’ ever-changing dangers.

Locating and Utilizing Basic and Advanced Skill Trainers

Navigating Arrakis’ unforgiving landscape becomes manageable when you find the right mentors. Trainers act as bridges between your current capabilities and advanced techniques hidden within the skill tree. Their scattered locations challenge players to explore beyond safe zones while testing survival instincts.

Identifying Trainers Across Arrakis

Basic trainers occupy strategic outposts requiring different approaches. Ghavouri at Griffin Trading Outpost evaluates combat precision through target drills. Samin Moro near Hagga Rift demands iron ore and plant fiber, testing resource management skills.

Trainer Location Requirements Specialization
Arno Pinnacle Station Iron gear, water supplies Swordmaster techniques
Sister Mesa Helius Gate Fremen ruin exploration Bene Gesserit mysteries
Derek Chinara Griffin Trading Post “Assistance Required” contract Planetologist class

Strategies for Unlocking Advanced Abilities

Reaching elite trainers in Arrakeen or Harko Village costs 2,500 Solari for Ornithopter transport. Save early-game currency by completing spice salvage missions. Once there, expect multi-stage quests requiring:

  • High-tier crafting materials
  • Allied squad support for group challenges
  • Secret faction knowledge checks

“True mastery begins when you stop following paths and start creating them.” – Unnamed Planetologist

Advanced abilities often demand rare components found in storm-blasted regions. Pair reconnaissance upgrades with survival traits to secure these materials safely. Remember: every unlocked node reshapes your skill tree potential in unexpected ways.

Mastering Class Progressions and Specializations

Your first steps on Arrakis carry more weight than you might expect. The starting class you select acts as a blueprint for your early survival strategy, influencing everything from combat approaches to faction interactions. Unlike games with reversible choices, your initial pick determines which exclusive abilities become available during those critical first hours.

Dune Awakening class selection

Strategic Foundations for Desert Survival

Trooper skills might seem appealing, but Griffin Trading Outpost’s trainer unlocks them within minutes. Savvy players instead choose Swordmasters for acrobatic dodges that evade sandworm attacks, or Mentats for automated turrets that guard spice harvests. Bene Gesserit initiates gain The Voice – a crowd-control ability that turns ambushes into tactical retreats.

Consider these early-game advantages:

  • Swordmaster dash techniques shorten dangerous desert treks
  • Mentat deployables handle threats while you gather resources
  • Bene Gesserit mind tricks bypass combat entirely in negotiations

“A blade chooses its master in the first heartbeat of conflict.” – Sardaukar Drill Instructor

Respec options exist through rare spice-infused items, but their 48-hour cooldown makes initial planning vital. Hybrid builds emerge later, but your starting class remains the core of your character’s identity. Balance immediate survival needs with late-game synergy potential when locking in your choice.

Integrating Survival Tactics with Skill Development

Thriving on Arrakis requires merging survival instincts with strategic planning. Your ability to adapt skills to environmental threats determines whether you conquer the desert or become another sun-bleached relic. Smart players treat every ability as a tool for overcoming both enemies and ecosystems.

Managing Essential Resources and Overcoming Desert Challenges

Water dictates life on this harsh planet. Exposure drains your reserves faster than sandworms breach defenses. Early-game scavenging from plants using the Dew Reaper tool evolves into advanced systems: Blood Extractors convert fallen foes into drinkable supplies, while cisterns stockpile reserves for emergencies.

Your gear choices amplify survival potential. Literjons keep you hydrated during spice runs, while upgraded purifiers filter toxins from scavenged liquids. Pair these with mobility-focused abilities—like Swordmaster dash techniques—to outpace sandstorms and locate shade before exhaustion strikes.

True mastery lies in balancing combat growth with resource management. A Mentat’s reconnaissance skills spot hidden oases, while Trooper fortifications protect vital water harvesters. Every decision weaves another thread into your safety net against Arrakis’ relentless trials.

FAQ

What starting classes offer unique advantages in Dune: Awakening?

The Bene Gesserit focuses on diplomacy and psychic manipulation, while the Mentat excels in tactical planning. The Swordmaster prioritizes melee combat, and the Trooper specializes in ranged weaponry. Each class unlocks distinct skill trees tied to Arrakis’ harsh environment.

Where can players find skill trainers on Arrakis?

Basic trainers reside in faction hubs like sietches or major cities. Advanced trainers hide in remote regions—look for markers near rocky outcrops or abandoned spice harvesters. Completing faction quests often reveals their locations.

Can I combine abilities from multiple classes?

Yes! Hybrid builds let you mix Bene Gesserit mind-control with Swordmaster blade techniques. Experiment with cross-class synergies, but prioritize survival skills like water conservation early to endure desert threats.

How does survival tie into skill progression?

Skills like terrain navigation or moisture farming directly impact resource gathering. Ignoring these might leave you stranded during sandstorms. Always balance combat upgrades with survival-centric abilities.

Is respeccing my character possible later?

Yes, but it requires rare spice essence found in deep desert zones. Plan your initial build carefully—early-game respecs drain valuable resources needed for gear upgrades.

What’s the fastest way to unlock advanced abilities?

Focus on faction reputation quests. High-tier skills like the Mentat’s battle simulations or Trooper’s artillery mastery require allegiance to specific groups. Always carry extra water for long expeditions!

How do I manage scarce resources while upgrading skills?

Prioritize crafting moisture traps and recycling gear. Trade excess spice for water at nomadic camps. Efficient resource loops let you experiment with skill trees without risking dehydration.

Mastering the Base in Dune Awakening: A Guide


Surviving Arrakis in Dune: Awakening demands more than combat skills or quick thinking. Your base becomes your lifeline against the planet’s brutal challenges. From sandstorms to rival factions, a well-designed shelter isn’t optional—it’s the key to thriving in this survival MMO.

This guide helps you create a fortress that withstands environmental threats and enemy raids. Learn to position structures strategically, manage resources efficiently, and adapt to Arrakis’ ever-changing dangers. Whether you’re new to the franchise or a survival-game expert, these insights will elevate your gameplay.

Discover why location matters when avoiding sandworm attacks. Explore design principles that balance defense with functionality. Unlock advanced techniques to outlast Coriolis storms and competing players. Your journey to becoming an Arrakis powerhouse starts here.

Key Takeaways

  • Strategic placement shields your base from sandworms and storms
  • Modular designs allow quick adaptation to new threats
  • Resource management determines long-term survival success
  • Defensive layers protect against both AI and player attacks
  • Climate awareness prevents catastrophic environmental damage

Introduction to Base Building in Dune: Awakening

Constructing a fortress on Arrakis requires more than gathering materials. Your shelter serves as a multi-purpose stronghold against relentless threats. From crafting rare gear to hosting allies, strategic design determines whether you flourish or perish in this survival-focused game.

The Importance of a Safe Haven on Arrakis

Arrakis punishes the unprepared. Temperatures swing from blistering heat to freezing darkness within hours. A well-planned base regulates your environment while storing vital resources. It also provides safety during sandworm attacks or enemy raids.

Advanced crafting stations need stable infrastructure. Without proper facilities, creating vehicles or weapons becomes impossible. Your fortress evolves into a production center for essential survival tools.

Key Concepts and Survival Mechanics

Three pillars define successful base building: protection, utility, and adaptability. Layered defenses deter rival players, while modular layouts let you expand as needs change. Resource management systems prevent shortages during extended storms.

Function Benefit Importance
Protection Blocks environmental damage High
Crafting Unlocks advanced gear Critical
Social Hub Facilitates alliances Medium
Resource Storage Prevents loss during raids High

Alliances form naturally around established structures. Shared workshops and planning areas turn solitary outposts into thriving communities. This social layer adds depth beyond basic survival mechanics.

How to Build Base Dune Awakening: Getting Started

Establishing your presence on Arrakis begins with securing territory through the sub-fief console. This device marks your claim and defines buildable zones. Choose locations carefully—starter areas like Hagga Basin offer safer construction, while the Deep Desert challenges veterans with intense PvP dynamics.

sub-fief console setup

Understanding the Sub-Fief Console and Land Claim

Your first task is locating unclaimed server space free from landmarks. The sub-fief console creates a territorial outline when paired with a Solido Construction Projector. Starter versions limit expansion, but advanced models unlock vertical growth through staking units.

Three consoles maximum can be owned, with only two basic units permitted. This forces strategic planning early on. Always position your projector near the console—failure here invalidates construction rights.

Initial Tools and Setup Essentials

Essential gear includes the Solido projector and at least one console. Follow this process:

  • Scout regions matching your risk tolerance
  • Deploy the console-projector combo in open areas
  • Verify boundary markers before building
Console Type Expansion Capability Max Allowed
Starter None 2
Advanced Horizontal/Vertical 3

Resourceful players upgrade consoles quickly. Advanced units support layered defenses and multi-story designs crucial for surviving raids. Remember: your initial area choice impacts long-term survival odds.

Strategic Planning and Location Selection

Your survival on Arrakis hinges on smart positioning. The right location acts as both shield and supply line, balancing protection with resource access. Let’s explore how terrain and resource proximity shape your success.

Choosing the Right Terrain and Flat Areas

Natural flatness saves hours of adjustments. While foundation tiles smooth rocky surfaces, starting in pre-leveled areas lets you focus on expansion rather than repairs. Look for spaces allowing single-story growth without terrain clashes.

  • Prioritize zones with existing clearings
  • Avoid steep slopes requiring multi-level supports
  • Check perimeter accessibility for future upgrades

Settling Near Critical Resources

Isolation risks dehydration and starvation. Base near scavenger camps to convert blood into water—a lifesaver during early game struggles. Resource-rich zones offer:

  • Frequent dew flower spawns
  • Quick access to salvage materials
  • Trade routes with wandering merchants

Remote locations might feel safer but drain time through constant supply runs. Your first place should cluster essentials within 30 seconds of movement. Remember: relocation remains an option once you secure advanced blueprints.

Setting Up Your Base Structure and Layout

Your fortress on Arrakis becomes an extension of your survival strategy. Whether crafting alone or collaborating with allies, building mechanics offer freedom seen in top-tier survival games. The system balances creativity with practicality—design sleek outposts or sprawling compounds using modular pieces.

Customizing Your Design with Building Components

Four core elements shape every base build:

Component Type Examples Strategic Value
Structural Walls, floors, ceilings Core protection
Functional Workstations, generators Resource production
Decorative Lighting, banners Morale boosts
Faction-Specific Atreides arches Special abilities

Prefer efficiency over design? Use blueprints to place ghost structures before committing materials. The Exchange marketplace lets players sell creative layouts—perfect for time-strapped survivors. Early-game CHOAM pieces provide essentials, but faction alliances unlock game-changing styles.

Planning mode transforms ideas into reality. Click once to preview placements, adjust angles, then confirm with resources. This system prevents wasted materials while encouraging experimentation. Make sure to test layouts against sandstorms before finalizing.

Multi-team projects shine here. Combine blueprints with friends to create trade hubs or defensive networks. Shared building efforts often yield stronger results than solo attempts—especially when facing Arrakis’ deadliest threats.

Crafting, Resource Management, and Material Gathering

Transforming raw desert finds into survival tools separates rookies from veterans on Arrakis. Your shelter evolves into a production hub where schematics become life-saving gear. Smart organization turns scattered resources into streamlined workflows.

Dune Awakening crafting stations and storage systems

Efficient Resource Collection Techniques

Scavenging runs demand strategy. Focus on high-yield zones near rock formations where rare materials cluster. Dew collectors and salvage scanners boost efficiency—prioritize these tools early.

Store everything immediately. Storage containers protect against loss during sandstorms or raids. The game lets you craft directly from stored items, saving precious minutes when rebuilding gear.

Crafting Stations and Workbench Setup

Specialized stations determine what you can produce. A tiered approach works best:

  • Basic workbenches for repair kits and simple tools
  • Advanced forges for vehicle parts
  • Faction-specific modules for endgame gear

Link storage units to stations using the circuit system. This auto-pulls required components, letting you queue multiple craft items simultaneously. Group related stations near shared containers to minimize movement.

Resource Type Primary Use Storage Tip
Metallic Salts Weapon crafting Near forges
Spice Residue Medical items Cool, dry areas
Plasteel Scraps Structural upgrades Central location

Protecting Your Base from Threats and Natural Disasters

Securing your outpost demands constant vigilance against twin dangers: the planet’s wrath and rival ambitions. Smart defenses blend energy management with tactical positioning, creating layers that frustrate both environmental and human threats.

Shield Activation and Barrier Strategies

Shield walls form your first line of defense. Activate overlapping fields to deflect sandblast erosion and minor raids. Position generators underground—exposed units become easy targets during attacks.

Rotate shield segments to conserve power. Full coverage drains reserves quickly. Use motion sensors to activate barriers only when threats approach.

Energy Management in Extreme Conditions

Coriolis storms test every survivor’s preparation. Prioritize essential systems: cooling units and communication arrays. Store double the power cells you think you’ll need—blackouts during these events often prove fatal.

Connect backup generators to automatic triggers. This ensures seamless transitions when primary systems fail. Monitor consumption through linked control panels.

Countering Player-Led Assaults

Human enemies require psychological warfare. Place dummy storage rooms filled with decoy crates. Install sonic traps that disorient rather than kill—let the desert finish what you start.

Camouflage entry points using native rock patterns. Allies can memorize true access routes, while raiders waste time probing false walls. Regularly rotate defense patterns to protect base integrity against observant foes.

FAQ

What’s the best early-game strategy for resource gathering?

Focus on collecting basic materials like spice, scrap metal, and water first. Prioritize unlocking the solido replicator to craft essential tools and build a small shelter before exploring dangerous zones like the deep desert.

How do shields protect against Coriolis storms?

Activate shield generators to create a protective barrier around your structures. During storms, manage fuel cells carefully to maintain power—shields drain energy faster under extreme weather conditions.

Can I relocate my base later?

Yes! Use the sub-fief console to dismantle and move structures. Always scout new flat areas in advance and ensure you have enough resources to rebuild critical components like crafting stations.

Are there penalties for building near other players?

Settling too close might trigger territorial disputes or force you to pay taxes to dominant factions. Aim for isolated spots with access to critical resources while avoiding high-traffic zones.

What’s the purpose of blueprints?

A: Blueprints unlock advanced structures and upgrades. Collect them by completing missions, trading, or scavenging wreckage. They’re vital for expanding defenses like shield walls or specialized storage units.

How do I defend against raids?

Layer defenses with automated turrets, traps, and reinforced walls. Keep power generators hidden and stockpile repair kits. Team up with allies to create a fortified network against hostile players.

Can solo players thrive without a large faction?

Absolutely! Compact bases with efficient layouts and hidden crafting stations work well. Use stealth tactics, avoid attracting attention, and focus on upgrading shield systems for solo survival.

Navigating to Anvil Station in Dune Awakening


Reaching Anvil Station in Dune Awakening isn’t just a goal—it’s a survival test. This desert outpost serves as a lifeline for traders and fighters navigating Arrakis’ brutal sands. Whether you’re new to the game or a seasoned explorer, preparation is your greatest weapon against sandstorms, rival factions, and dwindling resources.

This walkthrough guide strips away the guesswork. Learn to prioritize water rations, identify safe paths through shifting dunes, and adapt when plans collapse. Veteran players recommend scouting routes at dawn and avoiding spice harvester activity zones. Always carry extra coolant packs—equipment failures here are deadly.

Key Takeaways

  • Anvil Station is critical for trading and resupplying in harsh desert conditions
  • Route planning requires real-time weather awareness and map analysis
  • Sandworm encounters spike near midday—travel during cooler hours
  • Pack redundant survival supplies like water filters and repair kits
  • Group travel reduces risk but demands clear communication
  • Backup navigation tools prevent disasters if primary tech fails

Setting the Stage: Dune Awakening Overview

Before braving Arrakis’ dangers, understanding your character’s origins and the world’s power struggles becomes vital. The story begins with a crash landing and a mysterious benefactor—elements that shape every decision ahead.

Game Background and Storyline

Your character isn’t just surviving—they’re hunted. Transported to Arrakis for crimes even the Imperium fears, survival becomes a quest for redemption. Rescued by Lady Jessica of the Bene Gesserit, you’re tasked to find Fremen survivors the empire claims are extinct.

This mission ties directly to faction alliances. Trust is scarce when every water merchant or spice runner remembers your criminal past. Early gameplay focuses on proving your worth through risky trades and stealth missions.

Key In-Game Locations and Factions

Three major forces dominate the sands:

  • House Atreides: Offers shelter but demands loyalty tests
  • Harkonnen Raiders: Attack on sight unless bribed with spice
  • Imperial Sardaukar: Patrol testing stations and crush dissent

Hidden Fremen camps provide rare gear upgrades, while abandoned mining outposts hold salvageable tech. Use awakening walkthrough guides to track these spots—their positions shift with sandstorms.

Essential Strategies: how to make it to anvil station in dune awakening

Mastering the journey across Arrakis demands equal parts preparation and adaptability. Smart explorers combine real-time environmental awareness with strategic pit stops to outmaneuver both natural threats and hostile factions.

Route Planning and Navigation Tactics

Survey probes transform dangerous treks into manageable routes. Climb rock formations or dunes to launch these devices—they reveal resources, enemy camps, and storm patterns across zones. The starting copper-rich areas feature fewer threats compared to iron or carbon territories.

Zone Type Key Feature Travel Window
Copper Fields Beginner-friendly terrain Dawn to mid-morning
Iron Wastes Sardaukar patrol routes Late afternoon
Carbon Ridges Sandworm activity Night (with thermal goggles)

Eastern Vermilius Gap serves as a critical checkpoint—mark this location when mapping alternate paths. Always note sheltered caves for emergency cover during sudden sandstorms.

Resource and Time Management

Carry triple your estimated water needs, but balance weight using lightweight alloy containers. Time your movements:

  • Harvest copper nodes early for basic gear repairs
  • Cross open desert stretches during cooler hours
  • Save carbon filters for iron zone air quality drops

Experienced players recommend the walkthrough guides wikielden method: chart three potential routes, then eliminate options as conditions change. Update your map hourly—shifting sands alter landscapes faster than scanners detect.

Discovering Imperial and Testing Stations

Imperial Testing Stations redefine cooperative challenges in Dune Awakening‘s harsh landscape. These shared combat zones demand sharp teamwork and adaptive strategies—arrive unprepared, and you’ll become another cautionary tale whispered at desert outposts.

Imperial Testing Station challenges Dune Awakening

Understanding Imperial Testing Station Mechanics

These facilities operate as persistent battle arenas where enemy forces and loot respawn rapidly. Early birds snag the best gear—delay your entry, and you’ll face picked-over supply crates and freshly respawned hostile patrols. The starter testing station near trading hubs helps newcomers learn:

  • Psychoactive plant mutants with predictable attack patterns
  • Basic shield-piercing tactics using scavenged weapons
  • Resource caching strategies before enemy reinforcements arrive

Exploring Testing Station 10 and Its Challenges

Imperial Testing Station 10 flips the script entirely. Harkonnen shock troops replaced scientists, turning research labs into kill boxes. Their shielded units nullify standard turrets, forcing creative solutions:

  • EMP grenades temporarily disable energy barriers
  • Ceiling-mounted vents offer flanking routes
  • Overloading coolant systems creates environmental hazards

Utilizing Map Surveys and Probes

Smart explorers deploy scanner drones before entering any station imperial testing zone. Thermal sweeps reveal:

Scan Type Intel Revealed Optimal Range
Biometric Enemy cluster locations 150 meters
Structural Weak wall points 80 meters
Resource Loot cache density 200 meters

Station 10’s final chamber teaches brutal lessons—once sealed inside, every combatant must fall before exits unlock. Bring allies or superior firepower.

Navigating the Perils of the Desert

Crossing Arrakis’ endless sands demands razor-sharp awareness. Every decision—from route choices to gear management—determines whether you reach shelter or become another desert casualty.

Silent Threats in the Sands

Sandworms strike without warning when travelers ignore two rules: never move rhythmically and always scan for drum sands. I learned this the hard way after losing a bike near the eastern vermillius gap. Though parked in shaded rocks, a sudden storm reduced it to scrap metal within minutes.

Daytime heat drains water reserves twice as fast as night travel. But darkness brings Sardaukar hunters scanning for heat signatures. Balance these risks by:

  • Marking sheltered caves along your path
  • Using irregular walking patterns to avoid worm attention
  • Carrying emergency sealant for bike repairs

The trail red scorpion region near eastern vermillius gap hides multiple wreck actaeon wreck sites—useful for scavenging parts but risky during peak worm activity. If stranded, hunt small creatures like the Muad’dib mouse. Their blood sustains life when water runs out, though the metallic taste lingers for hours.

Remember: shields attract worms like dinner bells. Unequip them when crossing open areas, and never assume a vehicle is safe—storms erase all traces of unprepared travelers.

Overcoming In-Game Combat and Obstacles

Surviving Arrakis’ dangers demands more than quick reflexes—it requires tactical mastery. Combat here punishes predictability while rewarding creative problem-solving. Whether facing shielded mercenaries or malfunctioning gear, every challenge demands a tailored approach.

Dune Awakening combat strategies

Strategies Against Enemy Encounters

Mentat-class characters bring powerful tools to firefights. Their poison grenades and portable shields shine against basic foes. But imperial testing stations train enemies to counter these tricks. Shielded knife fighters shrug off turret fire, while heavy gunners flank your position. Regular shooters? Their rapid-fire weapons demand cover dancing.

Three rules for victory:

  • Use EMP bursts to disable energy barriers
  • Target unshielded foes first to thin enemy ranks
  • Rotate between cover points every 8-10 seconds

Dealing with Equipment Failures and Repairs

Sand clogs filters. Heat warps metal. One collapsed gear system can strand you miles from safety. Always carry:

  • Welding wire for armor breaches
  • Spare coolant rods for overheating weapons
  • Emergency power cells for navigation tools

During a recent testing station raid, my sand bike’s locomotion system failed mid-retreat. Lesson learned: preventive maintenance beats desperate repairs. Now I scrub sand from joints hourly and swap filters before alerts sound.

Death costs more than money here—you lose hard-earned loot and reputation. Sometimes retreating to regroup proves smarter than fighting to the last breath. Live to battle another sunrise.

Teamwork and Multiplayer Insights

Surviving Arrakis becomes a shared adventure when allies join your cause. Private servers let trusted friends tackle brutal challenges together—like revisiting Testing Station 10 with coordinated tactics.

The Role of Friends in Multiplayer Tactics

Teaming up transforms impossible missions. On Scopique’s server, our group combined stealth scouts and heavy gunners to clear enemy-packed zones. One character distracts while others sabotage defenses—teamwork unlocks hidden paths and rare loot drops.

Communicating and Coordinating Under Pressure

Clear callouts prevent disasters during sandstorms or ambushes. Use npc locations voice markers to share intel without cluttering comms. When my squad shared base design blueprints, we built stormproof shelters twice as fast.

Pro tip: Assign roles before entering combat zones. Medics watch health bars, engineers handle repairs, and scouts track story-critical objectives. This structure kept Team Spode alive during our toughest game sessions.

FAQ

What’s the safest route to Anvil Station in the Eastern Vermilius Gap?

Prioritize using map surveys to locate testing stations and avoid sandworm hotspots. Stick to rocky terrain and deploy probes to mark resource-rich paths while steering clear of enemy patrols.

How do Imperial Testing Stations impact progression?

Imperial testing stations like Testing Station 10 offer trials for rare gear and copper resources. Completing these challenges unlocks server access for map data, critical for navigating the basin south region.

What’s the best way to survive sandstorms and sandworms?

Equip desert-proof gear and monitor environmental cues. Use ornithopters for rapid escapes, and store extra water to counter dehydration during prolonged storms.

Can friends help with multiplayer objectives like Actaeon Wreck?

Yes! Coordinate with friends to split roles—scouting, combat, or repairs. Voice chat ensures smooth teamwork during blood-level raids or trail red scorpion ambushes.

How do Bene Gesserit and Fremen factions affect gameplay?

Aligning with Fremen grants desert survival perks, while Bene Gesserit alliances unlock Mentat abilities for resource diplomacy. Both influence story quests and NPC interactions.

What’s the fastest way to earn money for gear upgrades?

Farm resources like copper at testing stations, sell excess loot from enemy encounters, and complete post-trial missions. Time-limited events also offer high-reward payouts.

How do I repair broken equipment mid-quest?

Carry repair kits crafted from scavenged parts. Use base design sharing to rebuild gear at allied outposts or salvage wrecks like the Actaeon wreck for rare components.

Traverse the Desert Dune Awakening: A Step-by-Step Guide


Mastering survival in Dune: Awakening begins with conquering Arrakis’ merciless sands. This alien world tests players through extreme heat, unpredictable terrain, and lurking predators that punish careless explorers. Every journey demands smart preparation – one wrong step could mean losing critical gear or facing permanent consequences.

New survivors often underestimate the dual threats of environmental hazards and resource scarcity. Water evaporates faster than hope under twin suns, while shifting sands hide dangers ranging from sinkholes to territorial creatures. Strategic planning separates thriving adventurers from those swallowed by the dunes.

This guide reveals proven methods to navigate Arrakis efficiently. Learn to interpret wind patterns, identify safe pathways, and conserve supplies during extended expeditions. We’ll break down risk-reward calculations for scavenging missions and explain how to avoid attracting unwanted attention from below.

Key Takeaways

  • Preparation determines survival odds in extreme conditions
  • Environmental hazards cause rapid resource depletion
  • Permanent gear loss raises stakes for every decision
  • Efficient routing maximizes exploration opportunities
  • Advanced techniques build on core traversal skills

Preparation: Gathering Essential Gear and Resources

Neglecting resource gathering turns Arrakis from challenge to death sentence. Smart explorers prioritize three categories: emergency hydration, injury management, and vehicle construction. Every choice here directly impacts your survival window when the twin suns blaze overhead.

Identifying Vital Equipment and Materials

Start with a corpse blood extractor – your emergency hydration lifeline. This grim tool lets you harvest moisture from fallen creatures when canteens run dry. Pair it with health kit components like sterile cloth and antiseptic paste. Pro tip: Craft two extra kits for unexpected sandworm encounters.

Stocking Up on Water and Copper Resources

Fill every container before leaving base. Use layered storage – drink from skins first, save sealed jugs for crises. For mobility, gather 50+ refined copper ore chunks. Search rocky outcrops near dawn when metal deposits glint faintly. Don’t forget Advanced Servoks – these rare engine parts spawn near abandoned mining camps.

Organize supplies using a tiered system: immediate needs up front, vehicle materials secured in pack corners. This setup lets you grab essentials mid-sprint when sandstorms appear on the horizon.

Understanding the Harsh Desert Environment

Arrakis’ twin suns don’t forgive mistakes, making shade your greatest ally. Survival here hinges on reading the landscape like a map – every rock formation and shadow tells a story. Heat management isn’t optional; it’s the difference between scavenging precious resources and becoming one yourself.

desert sunstroke prevention

Staying in the Shade and Avoiding Sunstroke

Direct sunlight drains hydration 40% faster than shaded areas. Prioritize routes with natural cover – sandstone overhangs and canyon crevices offer safe passage. Cave networks provide extended relief, but watch for territorial creatures lurking within.

Timed movements matter. Plan expeditions during cooler hours when shadows stretch longest. Use this simple rule: if your character’s shadow appears shorter than their height, seek cover immediately.

Shade Type Protection Level Water Loss Rate
Rock Overhangs High 0.8L/hour
Fabric Canopies Medium 1.2L/hour
Natural Caves Maximum 0.5L/hour

Even with the Stillsuit in Awakening, hydration levels plummet under open skies. Pro tip: Scan horizons for telltale dark patches – these often signal sheltered zones. Memorize three backup shade locations along your route before departing.

Environmental awareness becomes instinctual with practice. Notice how light angles shift between dawn and midday. What appears safe at sunrise might become a death trap by noon. Adapt your path like the dunes themselves – constantly, but with purpose.

How to Walk Across the Desert Dune Awakening

Survivors who thrive on Arrakis dance between danger and opportunity through smart scheduling. Night becomes your closest ally when covering vast distances – cooler temperatures let you conserve water while avoiding predators drawn to daytime heat. Establish a reliable pattern: explore under starry skies, then retreat to shelters when twin suns rise.

Blueprint for Successful Expeditions

Map your route using three-phase navigation. First, mark resource-rich zones and shaded rest stops. Next, calculate water needs plus 20% buffer for detours. Finally, identify escape paths from each checkpoint. “A plan without alternatives becomes a death warrant when sand shifts,” seasoned players warn.

Nocturnal movement offers dual advantages. You’ll spot bioluminescent markers invisible by day while conserving stamina. Pack light but smart – prioritize multi-use items like foldable moisture traps that serve as emergency signals.

Daylight hours transform into crafting opportunities. Use this time to:

  • Convert scavenged materials into upgraded gear
  • Analyze terrain scans for future routes
  • Repair equipment before nighttime departures

Always prepare contingency kits containing quick-deploy shelters and instant hydration pellets. These compact lifesavers weigh less than 0.5kg but can extend survival windows by crucial hours when storms hit unexpectedly.

Mastering Movement and Traversal Techniques

Movement defines survival on Arrakis more than brute strength. Seasoned explorers combine specialized abilities with environmental awareness to outpace dangers. This section reveals techniques that turn shifting sands into navigable pathways.

Bene Gesserit sprint techniques

Leveraging Bene Gesserit Sprint Skills

The Bene Gesserit’s Bindu Sprint (Q key) reshapes early-game exploration. This burst of speed lets your character vault across hazardous stretches in seconds. Though it generates wormsign, proper timing ensures you reach rocky outcrops before threats surface.

Practice activating the sprint as your feet touch sand. This minimizes exposure while maximizing distance covered. “Treat each dash like a calculated gamble,” veteran players advise. Use it between elevated terrain points where vibrations dissipate faster.

Dodging Sandstorms and Sandworm Threats

Sandstorms create chaotic opportunities. Reduced visibility hides your movements from enemies but demands sharp directional awareness. Listen for low-frequency rumbles indicating approaching sandworms – these predators strike fastest during turbulent weather.

Develop a three-step response system:

  • Scan for nearest shelter within sprint range
  • Activate Bindu ability if vibrations intensify
  • Deploy decoy items when evasion isn’t possible

Remember: sprinting during storms risks attracting multiple threats. Balance urgency with caution, reserving energy for critical escapes. Pair these skills with terrain knowledge to create escape routes that leave predators chewing empty air.

Utilizing Vehicles and Respawn Tactics for Safe Travel

Smart explorers transform Arrakis’ endless sands into manageable pathways through mechanical mastery. While survival gear keeps you alive, mobility tools determine how much ground you can cover before the environment claims its toll.

Researching Sand Bikes and Respawn Beacons

Prioritize sand bike blueprints immediately after unlocking them. These two-wheeled marvels consume refined copper ore and Advanced Servoks – gather these materials during dawn scavenging runs. Veteran players emphasize: “A functional bike triples your exploration radius before needing water refills.”

Respawn beacons offer risk-reward navigation. Craft several using base resources and plant them at:

  • Resource-rich zones
  • Sheltered rest stops
  • Strategic vantage points

Managing Equipment and Avoiding Gear Loss

Teleportation via respawn menu cleanses your inventory – store rare components at base storage before activating. Carry only disposable gear during beacon jumps, like basic repair kits and spare fuel cells. This strategy minimizes losses while maintaining rapid transit capabilities.

Balance vehicle use with manual exploration. Sand bikes attract vibration-sensitive predators if overused in soft dunes. Alternate between mechanical speed and silent foot travel to maintain the element of surprise against Arrakis’ hidden threats.

Strategic Base Building and Efficient Route Planning

Establishing a stronghold on Arrakis requires understanding its geology as much as its dangers. Rock formations become lifelines – stable ground for structures and natural barriers against predators. Smart base building turns survival into domination.

Choosing Ideal Base Locations on Rocky Terrain

Sandworms ignore stone but devour anything on dunes. Scout elevated plateaus near resource clusters. The Haga Basin South trade post offers perfect positioning – close to copper deposits and emergency supplies.

Consider these factors when claiming land:

Location Resources Nearby Safety Rating
Haga Basin South Copper, Water 9/10
Imperial Testing Station Advanced Parts 7/10
Alion Wreck Scrap Metal 8/10

Mapping Resource Outposts and Trade Posts

Create a map network connecting three types of stops: supply caches, shaded rest areas, and outposts. Mark routes using rock formations as stepping stones. This “island hopping” method reduces sand exposure by 60%.

Update your charts after each sandstorm. Wind shifts alter dune patterns, creating new shortcuts or hazards. Veteran builders recommend carrying two maps – one for planned routes, another for real-time adjustments.

Water Management and Survival Tips

Managing hydration efficiently separates survivors from casualties on Arrakis’ scorching plains. While flashy gear grabs attention, seasoned explorers know water carriers often determine mission success. These humble containers become lifelines when temperatures spike or detours stretch supplies thin.

Using Carriers and the Liquid of Last Resort

Prioritize researching portable reservoirs early – they hold 3x more than basic canteens. Craft them using polymer scraps found near wrecked harvesters. “Carriers let you play the long game,” veteran players note. Always carry two: one for drinking, another as emergency reserve.

Blood consumption should remain a final option. While corpse moisture extraction prevents immediate death, it reduces maximum health by 15% for six hours. This penalty stacks with each use, creating vulnerability during critical moments.

Track consumption patterns using your inventory screen. Sprinting under twin suns drains reserves fastest – plan shaded rest breaks every 20 minutes. Spot natural sources like dew flowers near rock formations. These glowing plants replenish 0.5L when harvested at dawn.

Advanced management involves calculating needs:

  • Base rate: 1L per hour
  • Add 0.3L for sprinting or combat
  • Subtract 0.2L in shaded caves

Update your route when reserves dip below 40%. Detour to marked water stations or risk becoming another cautionary tale in the sands.

Tactical Climbing and Overcoming Natural Obstacles

Vertical mastery unlocks Arrakis’ hidden potential. While most focus on horizontal travel, smart explorers conquer cliffs and plateaus to gain tactical advantages. Elevated positions reveal secret paths and shelter opportunities invisible from ground level.

Scaling Rock Formations and Discovering Caves

Sandstone ridges offer secure handholds for methodical ascents. Scan for moss-like growths – these often mark stable climbing routes. Hidden caves frequently appear behind weathered outcrops, providing rare safe zones with natural water collectors.

Access these shelters by testing footholds in zigzag patterns. Keep three contact points while climbing – two hands and one foot, or vice versa. Sudden drops demand quick thinking: deploy emergency anchors if your grip falters.

Mitigating Fall Damage With Suspensors

Anti-gravity devices transform risky jumps into controlled descents. Suspensor belts activate mid-fall, reducing impact damage by 80%. Pair them with roll maneuvers upon landing to avoid twisted ankles.

For late-game explorers, Emperor Wings offer permanent slow-fall capabilities. This rare upgrade lets you glide between peaks, though fuel management remains crucial. Always carry repair kits – one malfunction at height could end your expedition.

FAQ

What gear is critical for surviving early-game desert exploration?

Prioritize water carriers, copper tools, and map markers. Craft lightweight armor to reduce heat exposure and store extra water in rocky terrain near caves or outposts. Always carry repair kits for vehicles like sand bikes.

How do Bene Gesserit skills improve desert traversal?

The Bene Gesserit sprint boosts speed during sandstorms, while their focus skills help detect threats like sandworms. Pair these with suspensors to minimize fall damage when climbing rock formations.

Where should I build bases to avoid sandworm attacks?

Construct bases on rocky terrain or near imperial testing stations. These areas deter sandworms and provide access to trade posts for swapping copper or gear. Avoid open dunes when placing respawn beacons.

How do I locate water sources in harsh environments?

Scan maps for shaded caves or abandoned structures. Use the Water of Life buff from underground basins south of testing stations. Carry collapsible storage to collect rainwater during rare storms.

What vehicles work best for crossing dunes quickly?

Sand bikes offer speed but attract sandworms. Research upgrades like noise dampeners at imperial outposts. For stealth, use hover platforms near rocky zones to bypass worm territories.

How do I recover gear after a sandworm attack?

Drop respawn beacons near your path. If gear is lost, backtrack using map markers or trade with NPCs at camps. Store backup equipment in base vaults to avoid permanent loss.

Can I climb desert cliffs without taking fall damage?

Equip suspensors from imperial testing stations to slow descents. Use grapple hooks on rock formations, and scout caves for hidden paths that bypass steep drops.

What’s the safest route through sandstorm zones?

Follow trade post routes marked on maps—they often loop around storms. If caught mid-journey, seek shelter in caves or deploy temporary structures. Use the Bene Gesserit sprint to outrun debris.