Recent Posts

Dune Awakening: Find the Third Trial Location


Navigating the vast deserts of this popular survival game can feel overwhelming, especially when searching for hidden objectives. This guide simplifies your journey to one of the game’s most intriguing—and frustrating—quests. Whether you’re a new explorer or a seasoned player, we’ll help you cut through the chaos and reach your destination efficiently.

The path to the Western Vermilius Gap requires careful planning. Hostile environments and unexpected threats demand smart resource management. Prioritize water conservation and watch for shifting sands to avoid attracting unwanted attention from underground predators.

Once you arrive at the rocky outskirts of the map, look for clan banners marking the ascent route. Combat readiness is crucial here: enemies guard the entrance, with two shield-bearing foes in the first corridor. Though the final altar holds a narrative twist, reaching it reveals critical insights about the game’s lore and factions.

Key Takeaways

  • Prepare thoroughly for desert hazards like extreme heat and sandworms
  • Follow visible clan markers to identify the correct path upward
  • Engage shielded enemies strategically in tight cave spaces
  • Discover story-driven surprises at the quest’s endpoint
  • Learn about faction conflicts through environmental storytelling

Introduction: The World of Dune: Awakening Trials

Surviving the scorching sands means embracing challenges that test both strategy and courage. The desert hides ancient secrets waiting to be uncovered by those brave enough to seek them.

What Are the Aql Trials?

These missions blend danger with discovery, pushing players to their limits. At their core, they reveal how the Fremen thrived in extreme conditions through resourcefulness and tradition.

Each trial aql begins at a weathered stone platform called an Aql Altar. Five unique missions await, each demanding careful preparation. You might face:

Challenge Risk Level Key Reward
Sandworm proximity Extreme Water conservation tech
Spice harvesting High Protective gear schematics
Dune navigation Moderate Map expansion data

Enhancing Gameplay with Hidden Challenges

The trial aql system turns survival into storytelling. Completing these quests unlocks crafting patterns for gear that changes how you explore. You’ll learn to:

  • Decode environmental clues about faction conflicts
  • Balance water supplies during tense journeys
  • Outsmart enemies in narrow cave passages

These trials aren’t just tasks—they’re lessons in Arrakis’ harsh reality. Every completed mission deepens your connection to the world while sharpening essential survival skills.

Understanding the Aql Trials and Their Importance

The desert teaches through hardship – a lesson the Fremen perfected over generations. Their survival methods become yours through these sacred tests, blending danger with discovery.
Fremen survival techniques

The Role of Fremen Wisdom on Arrakis

Every trial aql starts at weathered stone platforms called altars. These challenges mirror how desert natives conquered extremes:

Fremen Technique In-Game Application Reward
Water discipline Manage reserves during sandstorms Moisture trap blueprint
Spice forecasting Harvest before worm attacks Protective goggles schematic
Dune reading Navigate shifting landscapes Enhanced map markers

Unlocking Gear and Skills Through Trials

Completing these tests grants tools that change survival strategies. Key rewards include:

  • Static Compactor – turns flour sand into building materials
  • Portable stilltent – creates safe camping zones
  • Sandwalkers – silent footwear for stealth travel

The altar challenges serve dual purposes. They gatekeep advanced areas while teaching essential techniques. You’ll learn to spot edible plants and interpret wind patterns – skills that prevent fatal mistakes in later gameplay.

dune awakening third trial location

The Western Vermilius Gap isn’t just a destination—it’s a survival exam carved in stone. Your journey begins at the map’s western edge, where jagged rock formations rise like ancient sentinels. Look for vibrant clan banners fluttering in the dry wind—these mark the path to the cave lost pilgrim entrance.

Pathway to the Stone Labyrinth

Follow the upward trail from the rocky base, using painted symbols on boulders as confirmation markers. The ascent reveals three critical threats to anticipate:

Threat Type Counter Strategy Reward
Shielded fighters Flanking maneuvers Energy cell upgrades
Quicksand patches Probe with staff Navigation skill boost
Drum sand zones Light-footed movement Stealth ability unlock

Combat Survival Essentials

Upon entering the third trial aql chamber, you’ll face two shield-bearing opponents and one ranged attacker. Break their defense patterns with these tactics:

  • Target shield generators on their backs during attack animations
  • Use narrow corridors to limit enemy mobility
  • Conserve medkits for the altar chamber showdown

Remember: The vermillius gap tests both combat reflexes and environmental awareness. Watch for shimmering ground textures indicating unstable terrain, and listen for the distinct crunch of drum sand beneath your boots.

Navigating Diverse Trial Environments

Mastering Arrakis’ terrain requires sharp eyes and clever navigation. The game rewards players who decode its visual language – a mix of ancient symbols and natural landmarks that guide explorers through deadly beauty.
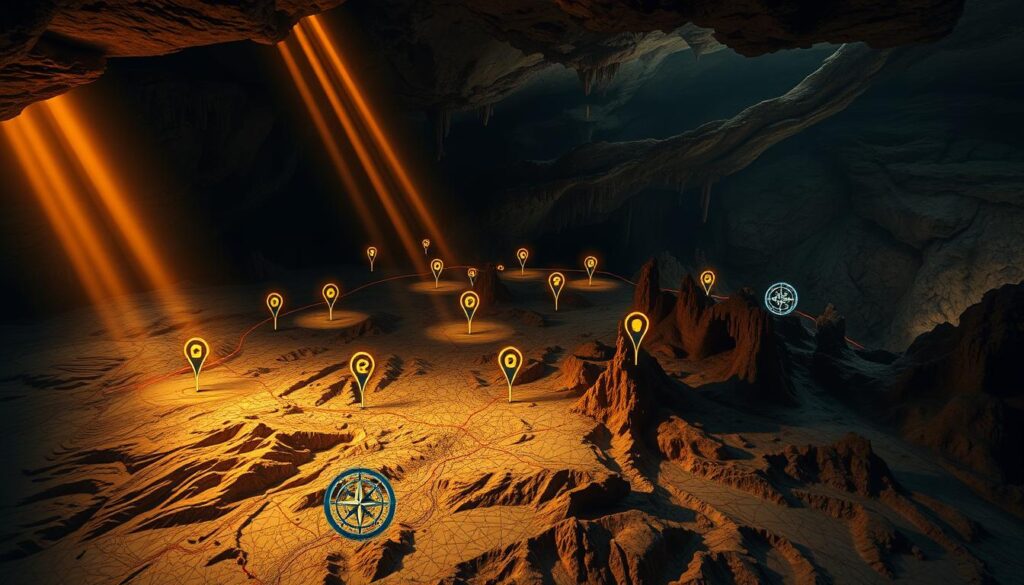
map markers and cave navigation

Interpreting Map Markers and Visual Cues

Your Journey menu holds vital clues. Select “Find the Fremen” to access sketch-like images showing key terrain features. These drawings highlight:

Visual Element Real-World Match Action Required
Triangular shadows Mesa plateaus Scan eastern slopes
Wavy lines Dune patterns Check wind direction
Circular marks Cave openings Search rock bases

When within 200 meters of a trial site, a pink icon appears. This confirms you’re on track without spoiling the discovery thrill.

Exploring Various Rock Formations and Caves

Distinctive stone shapes serve as natural signposts. Look for these common markers:

  • Hourglass pillars – indicate underground water sources
  • Slanted sandstone walls – often hide crevice entrances
  • Basalt clusters – mark safe paths through quicksand zones

Cave names like “Whispering Wind Cavern” hint at required actions. Bring echo-location gear for these spaces, and watch for glowing lichen that marks hidden chambers.

Strategies for Overcoming Enemies and Obstacles

Success in harsh environments hinges on smart preparation and adaptive tactics. Whether confronting shielded warriors or managing limited supplies, your choices determine survival outcomes.

Combat Tactics for Hostile Encounters

Shielded opponents require precision over brute force. Target their weak points during attack animations when defenses drop momentarily. Use tight spaces to limit their movement advantage.

Threat Effective Counter Benefit
Energy barriers EMP grenades Shield disable
Group formations Smoke distractions Isolate targets
Ranged attackers Reflective armor Damage reflection

Resource and Health Management

Underground challenges demand careful inventory planning. Prioritize these essentials:

  • Three water canteens minimum
  • Compact healing kits with blood-clotting agents
  • High-penetration ammo types

Route planning proves crucial for desert travel. “Circle south through rocky outcrops before approaching main objectives,” advises top-ranked player MaraJade42. This path reduces sandworm detection risks while providing safe staging areas.

Monitor your hydration meter during extended cave explorations. Combine water sips with shaded rest periods to maximize efficiency. Always leave 30% supplies for unexpected detours.

Decoding Clues and Riddles: Tools for Success

Cracking the game’s environmental puzzles becomes easier when you master its built-in navigation tools. The Journey menu transforms vague hints into actionable paths when you know how to interpret its secrets.
Fremen riddle solving

Utilizing the Journey Menu Effectively

Press ‘J’ to open your quest log and select “Find the Fremen” – your hub for active challenges. Each trial aql appears here with two crucial elements:

Feature Purpose Pro Tip
Riddle text Describes landmarks Note compass directions
Location sketch Shapes to recognize Compare with map labels

The “View Trial Location” button reveals hand-drawn rock formations. These match specific areas like crescent-shaped cliffs or triple-spire plateaus.

Analyzing Riddles for Accurate Location Finding

Clues like “where twin shadows meet at dawn” require real-world thinking. Successful players:

  • Cross-reference riddle phrases with their map
  • Mark potential matches with custom waypoints
  • Use the in-game compass for directional hints

“Treat each clue like a treasure map – words and pictures complete each other.”

– DesertNavigator91 (Top 5% Explorer)

When stuck, revisit completed quest areas. Many riddles reference landmarks near previous trial sites, creating connective threads between challenges.

Expert Tips for a Seamless Gaming Experience

Conquering Arrakis’ toughest challenges demands more than courage—it requires smart planning. Let’s explore how to turn preparation into your greatest weapon.

Gear Recommendations and Preparation

Equip the Shigawire Claw from the Trooper class for tricky climbs. This tool lets you scale rock faces faster, especially in vertical zones like Hollow Hammer. Pair it with a suspensor pack when exploring deep chasms—it prevents fatal falls in areas like Hagga Rift.

Always carry three essentials:

  • Portable moisture traps for emergency water
  • Compact medkits with clotting agents
  • Thermal-resistant outerwear

Timing Your Approach to Avoid Danger

Check server populations before starting group tests. High traffic times mean more competition at key entrance points. For solo runs, move during sandstorm cycles—enemy patrols decrease by 40%.

Master water management early. Players who learn distillation techniques progress 30% faster. Combine this with dawn/dusk travel to conserve supplies and avoid heat exhaustion.


FAQ

What are the Aql Trials?

The Aql Trials are a series of challenges designed to test your survival skills on Arrakis. Completing them unlocks unique rewards, including rare gear and abilities tied to Fremen traditions. Each trial focuses on exploration, combat, and problem-solving.

How do I locate the Western Vermilius Gap?

Head southwest from the Hagga Basin. Look for jagged rock formations resembling a crescent moon. Use the Journey Menu’s map markers to spot environmental clues, like cracked boulders or faint spice traces, leading to the entrance.

What gear works best for hostile encounters?

Prioritize silenced weapons and cloaking devices to avoid drawing attention. Carry a moisture collector to stay hydrated during prolonged fights. Upgrade your shield for defense against ranged attacks in open areas like the Jabal Eifrit.

How do riddles help pinpoint trial locations?

Riddles often reference landmarks, such as “the hollow hammer” or “basin south of the rift.” Cross-check these phrases with your map’s terrain features. For example, “shield wall” might indicate a fortified rock structure near the Hagga Rift.

Are there hidden caves in trial areas?

Yes! Explore narrow paths between rock formations for camouflaged cave entrances. The Cave of the Lost Pilgrim, for instance, hides behind a waterfall in the Vermilius Gap. Watch for faint carvings or discarded spice sacks as clues.

What’s the safest way to avoid enemies?

Stay stealthy by sticking to high ground and using sand dunes for cover. Time your movements during sandstorms, as reduced visibility makes it harder for patrols to spot you. Avoid open spaces like the Hollow Hammer during peak daylight.

How do I manage resources during trials?

Collect spice deposits for crafting and trade, but watch for worm signs. Store extra water in portable stillsuits and ration healing items. Use rock outcroppings as temporary shelters to recover health before advancing.

Can I replay completed trials?

Yes, though rewards reset weekly. Replaying trials lets you refine strategies, discover alternate paths, or tackle higher difficulty tiers for better loot. Check the Journey Menu for updated objectives or new riddles tied to repeat runs.

Dune Awakening YouTube: Explore the Latest Gameplay


Survival MMO fans are buzzing about a new title that blends genres on a deadly desert planet. Content creators on video platforms are sharing deep dives into its complex mechanics, from base-building to sandworm encounters. Players can now see how this ambitious project merges RPG storytelling with intense survival challenges.

YouTube creators offer step-by-step guides for mastering character customization and resource management. The community actively debates strategies for thriving in the harsh environment, sharing tips on faction alliances and gear optimization. Many videos highlight the game’s striking visuals, including dynamic sandstorms and player-designed outposts.

Newcomers will appreciate tutorials explaining the steep learning curve of managing water supplies and avoiding environmental threats. Content makers also break down the balance between cooperative PvE storytelling and competitive endgame PvP modes. This mix creates a fresh take on survival games, rewarding both solo explorers and team players.

Key Takeaways

  • Video platforms host extensive guides for mastering survival mechanics and base construction
  • Community discussions focus on optimizing strategies for desert exploration and resource gathering
  • The title’s visuals showcase detailed environments and dynamic weather systems
  • Beginner-friendly content helps players navigate complex gameplay systems
  • Unique PvE story elements blend seamlessly with competitive multiplayer endgame content

Gameplay Overview and Unique Features

Step into a reimagined universe where survival meets storytelling in unexpected ways. This alternate timeline reshapes familiar lore, replacing Paul Atreides with a new protagonist tasked with uncovering the Fremen’s disappearance. Players face Arrakis’ deadly beauty through two core pillars: narrative depth and environmental mastery.

Immersive Storyline and Setting

The story unfolds across 80+ hours of quests blending survival tasks with character-driven missions. Fully-voiced cutscenes reveal political tensions between noble houses, while environmental clues hint at the Fremen’s fate. Rocky canyons hide data logs, and abandoned settlements tell silent tales through crumbling architecture.

Survival and Environment Mechanics

Thirst meters and shifting sands demand constant attention. Players must:

  • Track water supplies during expeditions
  • Time movements between shade areas
  • Modify gear for sudden sandstorms

Vehicles left in open areas become worm bait, creating heart-pounding escapes. Resource gathering slows progress but rewards careful planners with rare crafting materials. These mechanics transform routine tasks into strategic dilemmas – risk dehydration for better loot, or play it safe?

Deep Dive into dune awakening youtube Content

Content creators are revealing how skill customization shapes both early exploration and high-stakes endgame moments. The survival MMO’s flexible approach lets adventurers tailor their experience through diverse playstyles and strategic choices.

class system skill trees

In-Game Class Systems and Skill Trees

Five distinct specializations offer unique ability combinations, from mind-controlling Voice techniques to explosive ordnance expertise. Trainers hidden across the desert allow mixing skills between classes, though locating them requires hours of exploration. While basic weapons handle most threats, creative builds shine in group content where tactical synergy matters.

Swapping equipped abilities takes seconds, letting players adapt to sandstorms or enemy bases. This freedom comes at a cost – advanced skills demand rare resources found in dangerous zones. Many creators suggest prioritizing gear upgrades over complex rotations until reaching max level.

Endgame Dynamics: PvE and PvP Balance

The real test begins when solo survival shifts to faction warfare. Organized groups use class synergies to dominate spice fields, while lone wolves focus on stealth and sabotage. Resource control becomes critical, with top-tier gear requiring time-intensive material farming.

PvE story missions scale difficulty based on party size, encouraging cooperation without forcing permanent alliances. Meanwhile, open-world PvP zones reward clever ability combos – like stunning opponents with mental powers before finishing them with ranged attacks. This balance keeps both combat styles relevant throughout the journey.

Community Insights and Developer Updates

The gaming community has shared passionate responses since launch week, particularly around high-level gameplay dynamics. While many praise the endgame progression system, heated debates continue about balancing different playstyles in Arrakis’ most dangerous regions.

Player Feedback and Endgame Experiences

Dedicated players reached the final challenges within two weeks, revealing friction between solo adventurers and large groups. Many report frustration in the Deep Desert, where PvP-focused alliances dominate resource-rich zones. “Solo players shouldn’t need bodyguards to collect T6 materials,” argued one Reddit user during Funcom’s recent AMA.

Creative director Joel Bylos acknowledged these concerns, confirming upcoming PvE-only areas for safer exploration. While control points remain PvP zones, new testing stations will let players harvest top-tier resources without unexpected conflict. This change aims to preserve the game’s tension while respecting different preferences.

Upcoming Changes and Funcom’s Roadmap

Balance adjustments arrive next month, targeting both vehicles and faction systems. Scout Ornithopters receive reduced aerial dominance through speed nerfs and heat management changes. A new ground-based rocket launcher gives infantry better counterplay options during PvP engagements.

The development team also plans:

  • Three-player dungeons with unique boss mechanics
  • Revised delivery tasks preventing resource stockpiling
  • Micro-rewards for solo and small group achievements

These updates show Funcom’s commitment to addressing community concerns while expanding the endgame experience. As Bylos stated, “We want the Deep Desert to challenge everyone, but never feel unfair.”

Conclusion

This survival MMO carves its own path through the genre with smart combinations of story-driven exploration and tense multiplayer dynamics. While the game asks for serious commitment – especially from solo adventurers managing bases and weekly tasks – its layered progression keeps dedicated players hooked for dozens of hours.

Creative guides from content creators help newcomers master everything from vehicles to faction politics. The Deep Desert remains a thrilling challenge, balancing high-risk PvP with cooperative opportunities. Though climbing glitches need fixes, performance stays smooth for most players on modern systems.

Funcom’s roadmap shows promising changes, including safer areas for resource gathering and better small-group rewards. Whether you’re here for the 80-hour story or endless endgame battles, this game delivers a fresh take on survival mechanics that evolves with its community.

For those ready to brave shifting sands and shifting alliances, Dune: Awakening offers a rich world that rewards patience and strategy. Just remember – on Arrakis, water is life, and time management is survival.

FAQ

How do survival mechanics handle resource scarcity in the deep desert?

Players must manage limited resources like water and spice while navigating harsh conditions. Dynamic weather, sandstorms, and territorial conflicts add layers of challenge, requiring strategic planning to thrive.

What role do vehicles play in exploration and combat?

Vehicles are essential for traversing vast deserts quickly and safely. They also serve as mobile bases during PvP skirmishes or environmental threats, offering tactical advantages in both solo and group play.

Can you customize your character’s class and abilities?

Yes! The class system allows deep customization through skill trees, letting players tailor roles like combat specialists or resource gatherers. Abilities synergize with group tasks, encouraging teamwork for endgame objectives.

Is there a balance between PvE and PvP in late-game content?

Endgame activities blend PvE story missions with territorial PvP conflicts. Teams can claim zones for bonuses, but must defend them against rivals, creating a risk-reward loop that keeps gameplay dynamic.

How does Funcom incorporate community feedback into updates?

Developers regularly share roadmaps via livestreams and forums, prioritizing player input on mechanics like faction wars or loot systems. Recent tweaks to sandworm encounters, for example, stemmed from beta tester suggestions.

Are there time-limited events or seasonal content?

Yes! Limited-time events introduce unique challenges, such as rare sandworm hunts or faction-based competitions. These often reward exclusive gear or cosmetics, keeping the experience fresh between major updates.

Dune Awakening: Uncover the Factions


Your journey across the sands of Arrakis begins with a critical choice: which powerful house will earn your loyalty? This survival-driven world demands strategic alliances, and your faction selection shapes everything from crafting blueprints to political relationships. Two dominant groups vie for control, each offering distinct advantages that redefine how you navigate conflicts, resources, and the ever-shifting desert.

Aligning with a house unlocks exclusive missions and specialized tools for spice harvesting. Your decisions determine who stands beside you in battles and who becomes your sworn enemy. Betrayal carries heavy risks—abandoning your chosen group erases all reputation progress, forcing you to rebuild trust from scratch.

Beyond the primary contenders, shadowy secondary organizations quietly influence the balance of power. These covert networks offer alternative paths for players seeking unconventional strategies. Understanding these dynamics is key to thriving in a world where every action ripples through the political landscape.

Key Takeaways

  • Two major houses dominate gameplay with unique crafting systems and mission types
  • Faction loyalty determines ally networks and resource-gathering methods
  • Switching allegiance resets all reputation progress with your original group
  • Secondary organizations provide hidden opportunities for strategic players
  • Political decisions directly impact survival mechanics and combat encounters

Introduction to Dune Awakening and Its Faction Dynamics

Step into a reimagined Arrakis where familiar sands hide shocking new truths. This survival MMO twists established lore, offering fresh challenges for veterans and newcomers alike. The desert planet’s brutal beauty remains, but key changes reshape every alliance and rivalry.

Overview of the Game World

Duke Leto Atreides’ unexpected survival rewrites the dune universe you thought you knew. His living presence transforms House Atreides’ strategies, while abandoned Fremen settlements dot the landscape like ghostly puzzles. Explore crumbling sietch tunnels to uncover clues about their sudden vanishing act.

Barren wastelands now buzz with opportunistic groups vying for control. Shimmering spice fields become battlegrounds for resource dominance, with environmental hazards testing even seasoned explorers. Dynamic sandstorms reshape terrain weekly, forcing constant adaptation.

The Importance of Faction Allegiance

Your chosen group determines how you survive, not just who you fight. Each faction provides unique crafting patterns that change base-building approaches. Some prioritize stealthy resource smuggling, while others excel in open desert warfare.

The vanished Fremen leave behind technology and secrets that fuel server-wide power struggles. Your early alliances lock in access to specific story arcs and cosmetic upgrades for gear. Smart players study each group’s economic specialties before pledging loyalty.

Remember: switching sides erases all progress with your former allies. This permanent choice affects everything from raid partners to marketplace prices. Choose a faction that complements your long-term goals in this ever-changing game of desert domination.

The Politics Behind Dune Awakening Factions

Control over Arrakis isn’t just fought with lasguns—it’s decided through calculated votes in the Landsraad council. This political system lets groups sway decisions that alter entire servers, from spice taxes to territory rights. Completing missions for your house builds influence points needed to propose game-changing decrees.

Landsraad political system

Faction Roles and Responsibilities

Each group shoulders unique duties shaping Arrakis’ future. Some specialize in brokering trade pacts, while others focus on military outpost expansions. Your guild’s role determines which objectives appear—diplomatic envoys unlock negotiation quests, whereas combat-focused teams secure warfront zones.

Covert operations matter as much as open conflicts. Smuggling rare materials or intercepting rival communications can tip voting balances silently. Successful factions coordinate these efforts across multiple player groups to maximize political gains.

Impact on Gameplay Strategies

Choosing a faction isn’t just about lore—it dictates your playstyle’s rhythm. Guilds aligned with economic powers prioritize resource networks, while militarized houses develop siege tactics. Even solo players contribute by completing contracts that feed into larger political goals.

The dynamic system ensures no two server landscapes stay identical. A passed decree might flood markets with cheap explosives or trigger sandworm migration patterns. Smart teams adapt strategies weekly, turning political shifts into tactical advantages.

Gameplay Impact of Choosing a Faction

Selecting your loyalties determines more than just your enemies—it defines your entire playstyle. Unlike traditional MMOs, this desert survival game ties progression to faction choice, with each alliance offering completely different tools and mission types. Your decision locks in access to exclusive gear patterns that transform how you build bases and navigate conflicts.

Commit to a group, and you’ll unlock signature vehicle designs ranging from sand-skimming transports to armored harvesters. Armor sets don’t just look distinct—they modify environmental resistance stats based on your house’s preferred terrain. Even decorative items like throne rooms and workshop benches reflect your faction’s architectural style.

Mission boards evolve based on your allegiance. One group might send you to sabotage spice harvests, while another tasks you with protecting trade routes. These contracts aren’t reskinned objectives—they feature unique story beats and reward types that dramatically alter your experience.

The balanced design ensures no correct choice exists. Whether you prefer diplomatic negotiations or aggressive expansion, both paths offer equally viable progression. Your selection primarily impacts which secret technologies you’ll uncover first and which NPC factions will welcome you in their settlements.

Long-term players notice deepening differences as they progress. Late-game schematics branch into entirely separate tech trees, ensuring your early decision continues influencing strategies hundreds of hours later. This approach rewards roleplaying enthusiasts and strategists alike, making every playthrough feel distinctly personal.

House Atreides: Honor and Diplomatic Strategy

In the shifting sands of political power, House Atreides stands as a beacon of calculated diplomacy. Their approach blends ancient codes of honor with modern survival tactics, creating a playstyle built for long-term dominance. Players drawn to strategic thinking thrive here, where every alliance strengthens your foothold on Arrakis.

house atreides strategies

Key Advantages and Benefits

The house Atreides toolkit focuses on turning allies into shields. Their diplomats unlock exclusive trade routes and NPC settlements, bypassing costly conflicts. Advanced vibration-wall technology protects bases from raids and sandstorms better than standard defenses.

Commanders gain bonus abilities when leading groups, improving unit coordination during large battles. Local populations share intel on spice deposits, giving Atreides loyalists first dibs on untouched resources.

Feature Atreides Benefit Harkonnen Contrast
Alliance Creation +40% negotiation success Forced conscription only
Base Defense Reinforced shield generators Offensive turret focus
Resource Access Shared NPC stockpiles Raiding caravans

Defensive Tactics and Alliances

This house turns every partnership into a defensive asset. Joint base projects with allies create interconnected strongholds across the map. Their signature “Sand Pact” mechanic lets players pool defensive resources during server-wide crises.

While the Atreides-Harkonnen rivalry fuels conflicts, smart commanders use diplomacy to redirect threats. Why fight sandworms alone when you can have allied harvesters bait them toward enemy outposts?

House Harkonnen: Ruthlessness and Offensive Prowess

Where others negotiate, House Harkonnen conquers. This house thrives on chaos, turning every conflict into an opportunity for expansion. Their playstyle rewards decisive action, letting players dominate through military superiority and psychological warfare.

Power and Aggressive Tactics

House Harkonnen specializes in shock-and-awe strategies. Their signature siege engines crush enemy defenses faster than standard artillery. Espionage networks reveal rival positions, allowing precise strikes against supply lines.

Fear becomes your greatest asset here. Completing intimidation missions boosts territory control bonuses, making opponents think twice before challenging your claims. Raid leaders gain temporary buffs when attacking outnumbered targets.

Exclusive Weaponry and Economic Benefits

Access to flamethrower units and sonic disruptors changes combat dynamics. These weapons ignore conventional armor, forcing enemies to adapt or perish. Economic perks let you claim 25% more spice from contested fields.

The Atreides-Harkonnen rivalry intensifies resource wars. While others build alliances, you’ll unlock black market contacts selling rare schematics. Every captured refinery fuels faster tech progression, creating snowball advantages for persistent conquerors.

Exploring Fremen and Their Desert Mastery

Ghostly whispers echo through crumbling tunnels where thriving communities once stood. The vanished desert dwellers left behind advanced survival secrets etched into abandoned settlements. Explorers willing to venture into remote regions can uncover techniques that transform how players interact with Arrakis’ deadliest environments.

Fremen desert mastery

Role in Arrakis’ Ecosystem

These masters of adaptation maintained delicate balances between survival and preservation. Their intricate water reclamation systems turned deadly dunes into livable spaces. Ancient murals in empty sietches show how they directed spice blooms without damaging fragile ecosystems.

Sacred sites contain weather-worn manuals detailing:

  • Sandworm detection through vibration patterns
  • Moonlight navigation techniques
  • Emergency shelter construction methods

Survival Tactics in Harsh Environments

Abandoned training grounds reveal revolutionary approaches to desert travel. Specialized sandwalking equipment reduces movement noise by 60% compared to standard gear. Hidden caches contain blueprints for portable stillsuits that outperform basic models.

Survival Aspect Fremen Technique Standard Method
Water Conservation 98% recycling efficiency 74% average
Heat Resistance 12-hour protection 5-hour limit
Storm Detection Bio-acoustic sensors Visual scanning

Deep desert locations hold the most valuable discoveries, but require mastering these techniques to access. Those who decode the environmental clues gain permanent upgrades, turning survival challenges into strategic advantages.

Bene Gesserit: Masters of Manipulation

Whispers shape empires in the shadows of Arrakis’ power struggles. The secretive Bene Gesserit weave through conflicts like desert winds – unseen but undeniable. While you can’t wear their black robes officially, their influence permeates every major decision across the sands.

Unique Abilities and Mental Disciplines

This ancient order offers training that reshapes how you interact with the world. Master their Voice technique to sway NPC decisions during tense negotiations. Through rigorous mental exercises, your character gains resistance to interrogation attempts and improved threat detection.

Physical mastery goes beyond combat. Learn to:

  • Conserve water 30% longer than standard survival methods
  • Read micro-expressions during faction dialogues
  • Detect lies in trader interactions through vocal patterns

Influence on Game Politics

The sisterhood’s intelligence network feeds players critical data about rival movements. One day you might receive coordinates for an unguarded spice silo. The next, warnings about an impending sandworm migration threatening your base.

Their guidance comes at a price. Every favor pulls you deeper into a system of hidden agendas. As one smuggler captain noted: “Bene Gesserit advice always serves three purposes – yours, theirs, and one you’ll never see coming.”

Dune Awakening Factions: A Closer Look

The heart of Arrakis’ power struggle beats through two opposing ideologies. Players must choose between honor-driven alliances or fear-based domination in this survival MMO, where your selected house defines every strategic decision. While other groups influence the political landscape, only two major powers offer playable paths with radically different philosophies.

Understanding the Main Divisions

Atreides loyalists build networks of trust, unlocking shared resources and defensive technologies. Their missions focus on stabilizing regions through diplomacy rather than brute force. In contrast, Harkonnen players thrive on chaos, gaining bonuses for aggressive expansion and resource seizure.

This isn’t just a cosmetic split—it’s a fundamental redesign of how you experience Arrakis. Base layouts, mission types, and even environmental interactions shift based on your allegiance. The game’s focused design ensures each choice carries weight for hundreds of hours.

Aspect House Atreides House Harkonnen
Core Philosophy Collective security Personal dominance
Resource Strategy Shared stockpiles Raided supplies
Progression Style Alliance-dependent Conflict-driven

Secondary groups like the Bene Gesserit appear as NPCs, offering unique contracts that test your loyalty. These interactions add narrative depth without complicating the central conflict. Your primary allegiance remains the compass guiding all major decisions.

Faction Contracts and Gameplay Benefits

The path to power on Arrakis winds through binding agreements and calculated risks. Contracts serve as the backbone of progression, offering structured challenges that sharpen your survival skills while advancing your group’s goals. These strategic deals evolve alongside your reputation, ensuring late-game players face thrilling new stakes.

Exclusive Missions and Schematics

Your faction determines which high-stakes assignments appear on mission boards. One group might task you with intercepting spice shipments under cover of sandstorms, while another requires discreet alliance-building with nomadic traders. Completing these unlocks rare schematics for gear like modular refineries or seismic survey tools.

Rewards and Progression Paths

Successful contract fulfillment showers you with tiered bonuses. Early rewards focus on survival essentials—upgraded stillsuits and reinforced storage units. Later tiers grant game-changing advantages like mobile base platforms or encrypted comms networks. Each completed deal strengthens your standing while subtly shifting server-wide power balances.

Smart players mix quick-turnaround contracts with long-term objectives. This balanced approach builds resource stockpiles while steadily unlocking exclusive technologies. Remember: every signed agreement weaves you deeper into your faction’s web of influence, making careful selection crucial for desert domination.

FAQ

How does faction choice affect my gameplay experience?

Your faction determines access to unique missions, gear, and alliances. For example, House Atreides offers defensive bonuses, while House Harkonnen unlocks aggressive tactics. Contracts and desert survival mechanics also vary between groups.

Can I switch factions after starting the game?

No, allegiance is permanent once chosen. However, betrayal mechanics allow limited collaboration with rival houses for short-term gains. Always weigh risks—shifting loyalties impact server-wide politics.

What exclusive rewards come with faction contracts?

Completing contracts grants rare schematics for armor, weapons, and vehicles. The Bene Gesserit, for instance, offers mental-discipline upgrades, while Fremen provide desert navigation tools. Rewards scale with your progression.

Are there faction-specific base-building advantages?

Yes. House Atreides bases gain defensive buffs, while Harkonnen structures boost resource farming. Fremen camps excel in hidden desert locations. Your choice shapes building styles and map control strategies.

Do factions impact PvP combat dynamics?

Absolutely. Harkonnen players get access to flamethrowers and siege gear, ideal for raids. Atreides supporters excel in shield-based duels. Team compositions often rely on faction synergies for territory clashes.

How does spice harvesting differ between factions?

Fremen harvest spice efficiently using sandworm-avoidance tactics. Harkonnen players prioritize speed over safety, risking attacks for higher yields. Contracts may also assign spice quotas for bonus gear unlocks.

Is the Ultimate Edition worth buying for faction content?

The Ultimate Edition includes early access to unique armor sets and weapons tied to major houses. If you value exclusive cosmetics and accelerated progression, it enhances faction-specific role-playing.

Can factions influence server-wide events?

Yes. Large-scale conflicts, like spice wars or sandworm attacks, are shaped by collective faction actions. Coordinated groups can trigger server bonuses or penalties based on their performance.

Dune Awakening Armor: Enhance Your Combat Edge


Surviving the scorching deserts of Arrakis requires more than quick reflexes—it demands strategic gear selection. In this unforgiving world, your equipment isn’t just about defense. It’s a lifeline that balances hydration, mobility, and combat readiness.

Protective gear here works like a second skin. Specialized garments adapt to threats, whether you’re dodging enemy fire or battling sandstorms. Each piece influences your stamina usage, water recycling efficiency, and damage resistance, forcing you to think before you equip.

Choices matter deeply. A lightweight suit might help you outrun rivals, while reinforced plating turns you into a walking fortress. But there’s a catch—every upgrade affects your resource management. The right combination could mean the difference between thriving and barely surviving.

Key Takeaways

  • Gear selection directly impacts survival rates in extreme environments
  • Protective systems are fused with core gameplay mechanics like hydration and stamina
  • Different scenarios require specialized equipment for optimal performance
  • Every gear choice creates trade-offs between defense, mobility, and resource use
  • Strategic planning with equipment leads to long-term success in hostile zones

Introduction to Dune Awakening Armor

Mastering the hostile environment of Arrakis hinges on more than just skill—your gear defines your fate. Protective systems here follow a tiered progression, with seven distinct grades determining their effectiveness. From basic scrap-metal defenses to advanced plastanium composites, each upgrade unlocks new survival possibilities.

Article Overview

The equipment hierarchy starts with Salvage Grade gear crafted from scavenged materials. As you advance through research milestones, you’ll unlock superior tiers like Copper and Steel. Higher grades demand rare resources but offer game-changing benefits:

Grade Key Advantage Research Requirement
Salvage Immediate protection Starter Kit
Copper Heat dissipation Tier 2 Engineering
Steel Bullet resistance Tier 4 Metallurgy
Plastanium Self-repair function Tier 7 Nanotech

“Mix chest plates from Iron sets with Duraluminum leg guards to create hybrid builds that outmaneuver heavy opponents while maintaining decent protection.”

Game Context and Survival

Your character’s endurance depends on smart equipment combinations. A full Steel set turns you into a walking fortress but slows water recycling—a death sentence in arid zones. Meanwhile, Aluminum gear lets you sprint between oases but offers minimal combat protection.

Three critical factors shape every gear decision:

  • Thermal regulation capabilities
  • Encumbrance vs mobility balance
  • Resource consumption rates

Sandstorms will test your gear’s sealing efficiency, while rival players target underprotected harvesters. Your loadout isn’t just equipment—it’s your survival manifesto.

Understanding Armor and Stillsuits Mechanics

Survival isn’t just about combat—it’s about adapting your equipment to shifting threats. Protective systems fall into two categories: those built for battle and those designed for endurance. Choosing between them shapes your gameplay, but clever combinations can give you the best of both worlds.

Armor vs. Stillsuit Comparison

Combat gear focuses on deflecting damage, using layered plating to reduce injury risks. In contrast, stillsuits excel at water recycling, using catchpocket tech to convert sweat into drinkable reserves. While armor adds weight, stillsuits prioritize breathability for long treks.

modular gear customization

Feature Armor Stillsuit Hybrid Build
Primary Use Damage reduction Water conservation Partial bonuses
Key Tech Reinforced joints Catchpockets Mixed perks
Full Set Bonus +25% bullet resistance +40% water efficiency +12% balanced stats

Modular Gear and Customization

Mix a stillsuit body with light armor gloves and boots to sprint longer while recycling moisture. Full matching sets unlock maximum perks, but hybrids let you tackle unexpected challenges. One player reported:

“Wearing three armor pieces with a stillsuit mask gives me enough protection for skirmishes while preventing dehydration during raids.”

Experimentation is key. Try combining four stillsuit parts with one reinforced helmet for sandstorm resistance. Just remember—every choice has trade-offs. Your ideal loadout changes with each mission’s demands.

Heavy Armor: Dominance in Combat

When facing relentless enemy forces, your gear becomes your greatest ally. Thick plating and reinforced joints transform you into a walking fortress, perfect for weathering storms of attacks. The Kirab Heavy Jerkin stands out with its 100-point defense rating—enough to shrug off most projectiles and blunt strikes.

Stat Benefits and Damage Mitigation

This gear category specializes in absorbing punishment. Full sets reduce incoming damage by up to 18% against blades and nearly neutralize concussive strikes. One veteran player notes: “Wearing the Kirab line lets me hold choke points against ten enemies—something lighter gear can’t handle.”

However, every advantage has its cost. Sprinting drains stamina 15% faster, forcing strategic positioning. Heat becomes a critical weakness—venturing into sun-baked zones without auxiliary cooling spells disaster.

Defensive Capabilities in PvE

Heavy protection shines in prolonged battles against AI foes. Clearing imperial outposts or scavenger nests becomes manageable when you can endure multiple hits. Five-piece sets like the Kirab series create synergy:

  • Uninterrupted combat during extended raids
  • Reduced need for frequent healing pauses
  • Superior crowd control through sheer endurance

Just remember: this gear isn’t for solo explorers. Pair it with team members covering mobility and heat management to dominate warzones.

Scout Armor: Balancing Speed and Protection

Outmaneuvering enemies demands gear that keeps you light on your feet yet shielded from danger. Light armor systems excel in scenarios where agility trumps brute force, letting you dictate the pace of engagements. The Kirab Scout Jacket epitomizes this philosophy, blending 34 defense points with a 9% sprint stamina reduction.

scout armor mobility combat

Enhanced Mobility for Tactical Engagements

This gear category shines in close-quarters skirmishes. Its +15% blade protection lets you parry melee strikes confidently while conserving energy for evasive rolls. One raider squad leader explains: “With light armor, we flank heavy units before they can rotate their shields—speed becomes our weapon.”

Feature Benefit Combat Impact
Stamina Efficiency -9% sprint cost Longer flanking routes
Blade Defense +15% mitigation Superior melee dueling
Heat Resistance Moderate shielding Safer desert traversals

Scout gear rewards tactical positioning over static defenses. You’ll dodge sniper fire more easily and retreat from unfavorable matchups. However, this playstyle demands sharp awareness—one misstep against heavy gunners can end your streak.

Successful users mix hit-and-run tactics with terrain exploitation. As one veteran notes:

“Wear three scout pieces with reinforced gloves to maintain mobility while blocking critical strikes.”

Master these balances, and you’ll control engagements without sacrificing survivability.

Stillsuits: Essential Survival Gear for Arrakis

Thriving in Arrakis’ deadly ecosystem demands mastery of survival technology that goes beyond traditional combat gear. Stillsuits act as portable life-support systems, merging advanced moisture recycling with thermal regulation to conquer the desert’s twin threats: dehydration and extreme heat.

Water Recycling Features

The Kirab stillsuit body transforms survival through its catchpocket system. This network of micro-filters converts sweat into drinkable reserves at 37% efficiency. Key benefits include:

  • 500-unit storage capacity for extended expeditions
  • Automatic moisture collection during movement
  • Emergency water access via wrist ports

“My Kirab stillsuit generated two liters during a 12-hour sandworm patrol—enough to share with my squad.”

Heat Protection Explained

These garments excel where armor fails. The 0.5 heat protection rating reduces sunstroke risk by 62% compared to standard gear. Strategic design elements achieve this:

Feature Armor Stillsuit
Base Heat Resistance 0.1 0.5
Ventilation Ports 4 16
Insulation Layers 3 7

While offering minimal combat defense (10 armor points), stillsuits enable exploration of high-value areas other gear can’t reach. Their Fremen-inspired design proves essential for treasure hunters using Static Compactors in deep desert zones.

Utility Garments and Special Equipment

While most gear focuses on combat or survival, some equipment exists solely to conquer Arrakis’ deadliest secrets. Utility garments fill this niche—specialized suits designed for extreme scenarios where standard protection fails. These rare finds trade versatility for unmatched environmental resistance, creating high-risk, high-reward gameplay opportunities.

specialized utility gear in desert game

When Specialization Becomes Essential

Radiation suits dominate this category, offering 85% fire mitigation and complete radiation shielding. Their layered insulation provides triple the heat protection of standard gear, letting players explore volcanic zones and irradiated ruins. One explorer noted:

“Wearing a full utility set allowed me to harvest rare isotopes in the Glassed Wastes—an area that melts regular armor in minutes.”

Feature Utility Gear Standard Sets
Radiation Resistance 100% 15%
Combat Defense Low High
Slot Usage All 5 Mixable
Heat Protection 1.8 0.6

These garments demand careful planning. Occupying all equipment slots means sacrificing combat readiness—you’ll face enemies with minimal weapon resistance. They shine in specific situations:

  • Accessing story content locked behind environmental hazards
  • Farming unique resources from lethal zones
  • Completing faction missions in irradiated territories

Smart players keep utility gear stashed for targeted missions rather than daily use. Their power lies in enabling access, not direct confrontation. When the desert throws its worst at you, sometimes the best defense is the right equipment type for the job.

Evaluating Armor for PvP Encounters

Outsmarting opponents in player battles requires more than firepower—it demands gear that adapts to human unpredictability. Light protection often outperforms bulkier options here, letting you react faster than heavily armored rivals. The key lies in balancing defense with agility to counter unpredictable combat styles.

Mastering Movement Dynamics

Scout gear shines in PvP by turning mobility into weaponry. Stamina efficiency becomes critical when circling enemies or escaping ambushes. One veteran notes: “Light chest plates let me dodge three sniper shots consecutively—something impossible in heavy gear.”

Heavy protection works best in coordinated team fights where positioning matters less. While offering superior stats against explosives, the movement penalty leaves you vulnerable to flanking. Skilled players exploit this weakness ruthlessly.

Successful strategies involve analyzing opponents’ gear during initial clashes. Spotting reinforced gloves signals close-quarters specialists, while cooling vents hint at desert ambush setups. Adapt your approach mid-fight using these clues.

Remember: PvP victory often goes to those who control engagement distances. Light armor enables this through rapid repositioning, while heavy sets force riskier playstyles. Choose wisely based on your squad’s composition and preferred combat zones.

FAQ

How does heavy gear improve survivability in battles?

Heavy pieces like the Kirab Heavy Jerkin reduce incoming damage significantly, letting you tank hits during raids or boss fights. However, they drain stamina faster, so balance aggression with smart positioning.

Why choose scout gear over other types?

The Kirab Scout Jacket boosts mobility, letting you dodge attacks or flank enemies in PvP. It’s ideal for hit-and-run tactics while still offering moderate protection against ranged threats.

What makes stillsuits critical for desert exploration?

Stillsuits like the Kirab Stillsuit Body recycle sweat into drinkable water, countering Arrakis’ deadly heat. They also provide baseline defense against sandstorms and environmental hazards.

Can gear be mixed for hybrid builds?

Yes! Combine light gloves with heavy pants to optimize stats. Customization lets you prioritize heat resistance for deserts or damage mitigation for raids without sacrificing core perks.

How do utility garments differ from combat-focused sets?

Utility gear offers niche bonuses, like reduced water consumption or faster harvesting speeds. These are perfect for gathering resources but swap them for battle-ready sets before fights.

Is heavy gear viable in PvP scenarios?

It depends on your playstyle. While bulky armor protects against burst damage, agile players might outmaneuver you. Use it in tight spaces or team fights where mobility matters less.

What stats should I prioritize for endgame content?

Focus on heat protection and stamina efficiency for survival missions. For raids, prioritize mitigation stats like armor value or elemental resistance based on enemy attack types.

Dune Awakening: Uncover the Top Weapons


Surviving the scorching sands of Arrakis demands more than grit—it requires the right tools. With servers now live and updates rolling out, mastering your gear is key to thriving in this vast open-world experience. This guide breaks down essential strategies for newcomers and veterans alike, helping you navigate combat scenarios with confidence.

The recent launch introduces dynamic environmental challenges that shape combat decisions. From close-quarters skirmishes in spice-rich caves to long-range engagements across shifting dunes, your loadout determines survival. Server status updates and maintenance schedules ensure you’ll always know when to refine your tactics.

Interactive maps and community-driven build recommendations simplify early progression. Whether facing AI-controlled threats or rival players, understanding weapon tiers and upgrade paths creates lasting advantages. Let’s explore how to turn Arrakis’ dangers into opportunities.

Key Takeaways

  • Real-time server status updates keep players informed about live gameplay sessions
  • Environmental factors directly impact weapon effectiveness in different zones
  • Community resources provide optimized build paths for various playstyles
  • Regular maintenance ensures balanced combat mechanics and bug fixes
  • Hybrid gear setups outperform specialized loadouts in most scenarios

Introduction to Dune Awakening Weaponry

Every skirmish on the desert planet hinges on one critical factor: gear quality. Higher-tier items like Plastanium firearms deliver up to 40% more stopping power than basic models. You’ll notice this difference immediately when facing shielded enemies or armored sandworms.

  • Basic: Reliable starters with limited mod slots
  • Enhanced: Balanced stats + environmental resistance
  • Plastanium: Max damage output and unique perks

Don’t overlook durability stats. A top-tier plasma rifle might seem invincible, but harsh sandstorms degrade equipment faster than player combat. Always check your loadout’s condition before joining large-scale battles.

New players should prioritize these activities to upgrade their gear quickly:

  1. Complete faction missions for blueprint rewards
  2. Trade spice crystals at outpost vendors
  3. Scavenge abandoned harvesters in storm zones

Experimentation pays off here. Mixing kinetic pistols with energy-based melee tools often creates unexpected advantages. One beta tester reported, “Using a sonic dagger to disrupt shields before firing became my winning combo.”

Overview of dune awakening weapons

Mastering combat in the survival MMO starts with understanding your options. The game’s arsenal ranges from fiery crowd-control specialists to silent precision instruments. Close-range fighters might grab the GRDA 44 shotgun, while strategists favor the Jabal Spitdart’s poison-tipped darts.

Dune Awakening arsenal overview

Ranged options split into distinct roles. The Plasma Cannon melts armored targets, while the Disruptor SMG breaks energy shields. Pistols like the Snubnose offer quick draw speed—perfect for sudden ambushes in spice caves. One beta player noted, “My Maula pistol saved me three times during sandworm encounters.”

Blade enthusiasts get twelve melee choices. The Crysknife’s vibration edge slices through defenses, and the Rapier’s reach controls spacing. Heavy hitters might prefer the Glutton’s Hook for its brutal execution moves. Each tool adapts to different battle scenarios and personal playstyles.

Experimentation proves vital. Mixing a Karpov 38 sidearm with a Kindjal dagger creates versatile close-mid options. Recent server updates added three new craftable blueprints, expanding combo potential. Always check community guides for fresh loadout ideas that match your tactical approach.

Key Features of Top Dune Awakening Weapons

Choosing the right tools in harsh environments separates survivors from casualties. Superior equipment combines raw power with clever design, giving you an edge when stakes run high. Let’s break down what makes certain armaments stand out.

Quality Dictates Combat Outcomes

Plastanium-tier gear delivers 50% more stopping power than standard models. These master-crafted tools feature reinforced barrels and heat-resistant alloys, crucial for prolonged desert engagements. Three factors determine effectiveness:

  • Base damage against armored targets
  • Durability during sandstorms
  • Modification slots for upgrades

One beta tester noted, “My plasma rifle shredded enemy shields before overheating—game-changer!” Always prioritize quality when upgrading your loadout.

Breaking Defenses With Smart Tech

Modern armaments bypass protections through clever engineering. Shield-piercing rounds ignore 35% of energy barriers, while toxin injectors cause lingering health drains. Consider these tactical advantages:

  • Fire mods force enemies out of cover
  • EMP bursts disable mechanical threats
  • Corrosive coatings weaken armor

Mixing damage types keeps opponents guessing. A venom-edged blade paired with shock rounds creates brutal synergy, melting through defenses faster than single-effect gear.

In-depth Analysis of Featured Weapons

Strategic loadout choices determine victory in hostile terrain. Three standout tools reshape combat dynamics through unique mechanics and tactical flexibility. Let’s dissect their strengths and ideal use cases.

disruptor pistol analysis

Small Guns and Pistol Advantages

The Regis Disruptor Pistol dominates close-range duels. Its charged plasma bolts bypass shields instantly, rewarding precise aim with lethal headshots. One beta tester shared, “Landing a fully-powered shot feels like flipping a battle’s script.” Master its charge timing to maximize effectiveness.

For mid-range skirmishes, the Burst Drillshot delivers unmatched shield penetration. Though its slow reload demands careful positioning, the spread of armor-piercing darts shreds grouped enemies. Pair it with mobility gear to offset its weight.

Heavy and Long-range Weapon Insights

Snipers thrive with the Tripleshot Rifle’s triple-dart system. Each poison-tipped round stacks damage over time, forcing opponents out of cover. The burst-fire mode maintains pressure while conserving ammo.

Heavy specialists should note:

  • Drillshot’s charge time drops by 20% in open terrain
  • Disruptor models gain +15% accuracy when stationary
  • Poison effects bypass personal defense systems

Balance your kit to exploit these traits. A disruptor pistol paired with a rifle creates adaptable threat coverage, while drillshot specialists need close-support teammates. Always match your tools to the terrain’s demands.

Expert Tips for Optimizing Your Build in Dune: Awakening

Mastering player-versus-player encounters demands more than quick reflexes—it requires smart environmental adaptation. The most intense battles often erupt in the deep desert zones, where traditional combat rules get flipped by shifting sands and lurking threats.

These arid regions disable energy shields and punish careless tactics. Activating protective gear risks summoning colossal sandworms, creating chaotic battlefield conditions. Savvy competitors now favor lightweight kits that prioritize mobility and precision strikes.

Ranged Dominance in Open Terrain

Long-distance specialists thrive where others falter. The GRDA 44 shotgun pairs perfectly with jump packs for hit-and-run tactics, letting you blast opponents before vanishing into dust clouds. One beta tester raved, “My hoverbelt/flamethrower combo melts close-range rushers before they swing!”

Sniper-focused builds exploit the desert’s vast sightlines. High-ground positions become death zones when manned by marksmen using poison-dart rifles. Team coordination shines here—spotter/scout duos can lock down entire sectors.

Three essential rules for desert skirmishes:

  • Always carry emergency mobility tools
  • Rotate positions after each engagement
  • Save explosive gear for worm diversion tactics

Recent server updates boosted flamethrower range, making them prime area-denial tools. Pair these with terrain-altering grenades to control enemy movement paths. Remember—every second counts when the ground itself might turn against you.

Exploring Variety: From Melee to Ranged Options

The key to survival lies in the perfect harmony of close-quarters aggression and calculated distance strikes. Let’s examine how different tools reshape battlefield dynamics.

melee and ranged combat options

Melee Combat: Swords and Blades

Spark-Sword users dominate duels with its unmatched reach—three times longer than standard blades. This plastanium masterpiece slices through armor like hot steel through wax, making it essential for crowd control. One tester remarked, “Landing a charged thrust feels like ending debates permanently.”

Zantara’s Crysknife offers lightning strikes but demands precision. Its fragile design shatters after 200 hits, rewarding aggressive playstyles. Consider these factors before wielding it:

  • 40% faster swing speed than daggers
  • Permanent destruction upon breaking
  • Silent attacks bypass enemy detection

Ranged Tactics and Versatile Builds

Abulurd’s Rapture bridges combat ranges with shield-piercing darts. Each shot delivers poison buildup, forcing opponents to retreat or face gradual collapse. Pair it with terrain-altering grenades to create deadly choke points.

Spice storms dramatically affect engagement ranges. During low visibility, blades often outperform rifles. Smart loadouts always include:

  • One armor-crushing melee option
  • Mid-range disruptor for shield stripping
  • Emergency mobility tool for repositioning

This design philosophy ensures every tool remains viable across shifting battle conditions. Whether you’re ambushing in caves or defending harvesters, adaptability wins wars.

Conclusion

The diverse arsenal in this survival MMO creates thrilling opportunities for strategic conquest. Close-quarters specialists and marksmen alike find tools matching their combat rhythm, from vibration-edged blades to shield-piercing artillery. Developers have struck a smart mix between honoring the source material and meeting modern gameplay demands.

Community feedback highlights exciting possibilities. Players are already suggesting new rifle variants and deeper customization while praising the attention to lore-driven designs. The evolving meta ensures fresh tactics emerge with each update, keeping the deep desert engagements unpredictable.

Newcomers should remember: mastery beats raw power. Test different loadouts against Arrakis’ challenges—spice storms demand different approaches than cave skirmishes. One beta participant noted, “Switching between my toxin dagger and plasma carbine turned impossible fights into victories.”

With updates shaping the combat landscape, now’s the perfect time to experiment. Whether you favor silent takedowns or explosive confrontations, the game offers paths to dominance. Keep an eye on patch notes—the next breakthrough build might arrive sooner than you think.

FAQ

How does shield penetration work with certain gear?

Weapons like the Disruptor Pistol bypass energy shields using high-frequency vibrations. This makes them deadly in close-quarters PvP, where breaking defenses quickly is key. Pair them with armor-piercing mods for maximum impact.

Are melee builds viable in open-world combat?

Yes! Blades like the Abulurd Rapture deal rapid poison damage, ideal for ambushes. Combine them with dodging skills and sand-based mobility gear to close gaps against ranged opponents in the deep desert.

What’s the best way to counter heavy rifles?

Use terrain to your advantage. The Burst Drillshot excels at area denial but has slow reload times. Flank users with silenced pistols or hit-and-run tactics using poison-tipped blades to disrupt their rhythm.

Can gear quality affect spice harvesting?

Absolutely. High-tier tools like the Desert Wind rifle’s drill attachment increase spice yield by reducing harvest time. Upgrade durability stats to survive sandworm encounters while gathering resources.

Do status effects stack with ranged weapons?

Certain mods allow stacking—like incendiary rounds causing burn damage over time. The Disruptor Pistol can also chain shock effects in wet environments, making it versatile for dynamic combat scenarios.

Explore the Dune Awakening Interactive Map


Mastering Arrakis just became easier with cutting-edge navigation tools designed for modern explorers. This guide reveals how real-time tracking and collaborative features redefine desert survival gameplay, letting you chart territories smarter than ever before.

Four distinct regions await discovery: the resource-rich Hagga Basin, bustling Arrakeen settlements, mysterious Harko Village, and perilous Deep Desert. Each zone challenges players with unique environmental hazards and hidden rewards. Customizable markers help you document everything from rare materials to friendly NPCs.

Gone are static charts that limit creativity. Instead, dynamic systems adapt to your exploration patterns, whether you’re scavenging solo or coordinating with allies. Progress syncs seamlessly across devices through browser-based tools and companion apps – your discoveries stay updated wherever you play.

Key Takeaways

  • Track resources and points of interest in real time across four distinct regions
  • Personalize your navigation with color-coded markers and progress logs
  • Access synchronized mapping data on PCs, consoles, and mobile devices
  • Collaborate with allies using shared location tagging features
  • Adapt strategies using terrain-specific survival challenges in each zone

Overview of Dune Awakening and Its Interactive World

Venture into a vast desert realm where survival hinges on smart navigation and strategic planning. This immersive experience blends Frank Herbert’s iconic universe with modern gaming innovations, creating a world where every decision impacts your journey.

Understanding the Game’s Setting in Arrakis

Arrakis isn’t just a backdrop – it’s a living ecosystem. Dynamic sandstorms reshape landscapes overnight, while hidden oases offer temporary respite. Players must balance resource gathering with constant environmental threats:

Region Key Features Challenges Purpose
Hagga Basin Beginner resources Limited water sources Base building
Arrakeen Trading posts Faction politics Social interactions
Harko Village Military outpost Hostile patrols Advanced gear
Deep Desert Spice fields Sandworm attacks Endgame PvP

“Water flows upward to the dead in the desert – survival belongs to the prepared.”

An Introduction to the Interactive Map Concept

The game’s navigation system evolves with your progress. Custom filters highlight nearby resources, while shared markers let teams coordinate spice harvesting routes. Unlike traditional maps, this tool learns from your playstyle – frequent sandworm sightings trigger automatic danger zones on your display.

Three core features redefine exploration:

  • Real-time weather overlays showing approaching storms
  • Personalized heatmaps tracking frequented locations
  • Cross-platform sync between desktop and mobile views

Key Features of the dune awakening interactive map

Smart navigation transforms survival gameplay into strategic mastery. The latest tools let adventurers document discoveries while adapting to Arrakis’ shifting dangers. Whether hunting rare gear or coordinating with allies, these systems keep you one step ahead.

Marker Systems and Custom Tracking

Personalized waypoints help explorers tag everything worth remembering. Create color-coded pins for resource hotspots, enemy bases, or hidden loot stashes. The system even tracks your progress automatically – perfect for solo adventurers revisiting half-explored areas.

Need specific gear? Try the Item-to-Container Search. Type “Aren” to find every crate holding those prized boots. This feature cuts loot-hunting time by 60% according to recent beta tests.

Marker Type Uses Customization
Resource Node Track material respawns Color filters
Danger Zone Avoid sandworm attacks Icon shapes
Loot Cache Find rare equipment Text labels

Real-Time Updates and Dynamic Events

Your map breathes with the living world. Sudden sandstorms redraw paths, while temporary spice deposits blink into existence. Team players share live updates through guild channels, turning individual scouting into group strategy.

Sync progress across devices effortlessly. Start planning routes on your phone during lunch, then execute them on your gaming rig at home. The system remembers everything – no more lost notes or forgotten coordinates.

Exploring Key Regions and Locations on Arrakis

Arrakis offers four distinct landscapes that test survival skills in unique ways. From the starter-friendly Hagga Basin to the sprawling Deep Desert, each area presents specific challenges and rewards. Understanding these zones helps players strategize their journey across the harsh sands.

Arrakis key regions map

Survival Grounds: From Beginner Zones to Endgame Challenges

The Hagga Basin spans 65 km² of manageable terrain, perfect for learning base-building and resource gathering. New explorers discover three subregions here: the mineral-rich Hagga Rift, the perilous Eastern Vermillius Gap, and Jabal Eifrit Al-sharq’s winding canyons.

House Atreides supporters thrive in Arrakeen, where guarded markets and quest hubs let players trade safely. Meanwhile, Harko Village caters to Harkonnen loyalists with black-market dealers and faction-specific missions that reward ruthless tactics.

Veterans brave the Deep Desert – a 500 km² PvPvE arena where weekly sandstorms reshape spice fields. This zone demands constant vigilance, as rival players and colossal sandworms stalk the dunes.

Hidden Treasures and Strategic Havens

Crash sites littered with shipwrecks become battlegrounds for rare schematics and weapons. These high-risk areas require quick thinking – you’ll often race against other scavengers to claim prizes.

Natural caves serve dual purposes: shelter from dust storms and secret stashes of water filters. Some caverns even hide NPC traders offering exclusive gear in exchange for rare materials.

Strategic players use Arrakeen and Harko Village trading posts to stock up before expeditions. These safe zones become vital pit stops when preparing for the Deep Desert’s unpredictable dangers.

Interactive Tools and Functionalities

Collaborative strategies take center stage with advanced planning systems designed for coordinated gameplay. These features transform how teams prepare for challenges, combining real-time communication with precision tracking.

Using Whiteboard Mode and Group Tools

Whiteboard Mode lets guilds sketch attack routes directly on shared maps. Draw defensive perimeters around bases or mark ambush points during sandstorms. Multiple users can edit simultaneously, making it perfect for last-minute strategy changes.

Group tools automatically sync discoveries across your team. When one player tags a spice deposit, everyone sees it instantly. Custom filters let squads focus on specific objectives – like hiding spots or enemy patrol patterns.

Item-to-Container Search and Filter Options

Need rare crafting materials? Type any component’s name to see every crate, enemy, or node that drops it. This search tool cuts loot hunts by half, displaying results as color-coded pins or sorted lists.

Filters give total control over your map view. Hide common rocks to spotlight precious metals, or mute low-level threats when preparing for endgame zones. Settings sync across servers, so your preferences stay consistent everywhere you play.

Navigating Gameplay Elements and Map Search Features

Strategic navigation becomes your lifeline in this unforgiving environment. Advanced tracking systems help players balance exploration with survival, turning chaotic sandscapes into calculated adventures.

enemy camps tracking system

Tracking PvP Zones, NPCs, and Enemy Camps

Color-coded PvP zones act as both warning signs and battle invitations. Peaceful explorers use crimson borders to steer clear of conflict areas, while thrill-seekers chase these hotspots for intense player showdowns. Recent updates added flashing alerts when rival squads enter your territory.

Enemy camps reveal more than just locations – hover over markers to see patrol sizes and recommended gear levels. Found a heavily guarded outpost? The system suggests flanking routes and optimal attack times based on your character loadout.

Imperial Testing Stations stand out with purple holograms. These abandoned labs reward brave explorers with vehicle upgrades but require careful planning. One beta tester noted: “The walkthrough markers saved hours – knew exactly which vents to sabotage before entering.”

VIP Tools and Companion App Integration

Premium users unlock real-time progress dashboards across devices. Manage three character slots simultaneously, each with separate checklists for gear, quests, and discoveries. VIP tools automatically reset objectives when starting new walkthroughs – perfect for completionists.

The companion app turns phones into command centers. Update team waypoints during commutes or check enemy camp respawn timers between meetings. Guild leaders especially love the shared annotation features – sketch battle plans that sync instantly to everyone’s map.

Feature Free Version VIP Benefits
Checklists 3 active Unlimited + Priority Sync
Enemy Intel Basic stats Patrol schedules + Loot tables
Cross-Device Sync 6-hour delay Real-time updates

Resource Management and Crafting Essentials

Thriving on Arrakis demands more than survival instincts—it requires smart resource strategies. Every canyon and dune holds materials critical for progression, with specific regions specializing in distinct crafting components. Let’s break down where to find essential elements and how they fuel your journey.

Strategic Material Hotspots

New explorers should target Hagga Basin South for copper ore deposits. This versatile metal forms the backbone of early-game gear like water recyclers and basic tools. Head east to find iron ore clusters perfect for crafting combat blades and turret defenses.

Veterans seek rarer components. The Eastern Shield Wall’s aluminum ore becomes vital for advanced base construction, while Sheol’s jasmium crystals enable energy weapon modifications. “Upgraded harvesters triple your yield in these zones,” notes a top guild leader.

Three key gathering tips:

  • Use salvaged metal from crash sites for quick repairs
  • Stockpile carbon ore from Jabal Eifrit for vehicle parts
  • Combine erythrite crystals with basalt stone for thermal armor

Imperial Testing Stations offer game-changing rewards. These abandoned facilities contain schematics for dune buggy engines and shield generators. Recent players reported finding enough aluminum ore here to skip 8 hours of farming.

The terrain rewards planners. Smart crafters rotate between regions—collect agave seeds for medkits in The O’odham, then mine basalt stone in Mysa Tarill for foundation slabs. Sync your map filters to highlight priority materials based on current projects.

Tips for Maximizing Your Interactive Map Experience

Optimizing your desert expeditions requires more than just a good compass—it demands smart system mastery. Whether you’re gathering rare materials or coordinating with allies, these strategies will help you outpace rivals and conquer harsh environments efficiently.

custom map filters and progress tracking

Customizing Filters and Marking Progress

Create specialized filter sets for different goals. Need crafting materials? Make a preset highlighting copper ore and basalt stone. Hunting vehicle parts? Filter maps to show crash sites and testing stations. Save these configurations to switch objectives instantly.

VIP users unlock game-changing tools:

  • Track three character progressions simultaneously
  • Sync checklists across phones, tablets, and gaming rigs
  • Reset exploration data when starting new walkthroughs

Strategies for Solo Players and Group Play

Solo adventurers should use the Mark as Completed feature religiously. Tag harvested resource nodes and cleared enemy camps to avoid backtracking. Set daily goals using priority lists for base upgrades or gear crafting.

Teams thrive with shared systems:

Role Tool Benefit
Scout Live Danger Markers Warn allies about sandworm movements
Crafter Resource Heatmaps Pin high-yield mining zones
Leader Group Checklists Assign objectives across regions

Considering premium features? The xREALM private server price matches standard rates, but purchasing through map tools directly funds new navigation upgrades. VIP access proves invaluable for players managing multiple projects – imagine tracking spice routes while blueprinting your next base expansion!

Conclusion

Conquering Arrakis requires both courage and clever use of technology. The right navigation systems transform endless sands into structured opportunities, letting you outsmart environmental threats and rival factions alike.

From tracking shifting spice fields in the deep desert to securing strategic base positions near rare materials, every discovery builds toward dominance. Teams thrive by sharing real-time updates about imperial ruins or sudden sandworm movements, turning chaotic landscapes into coordinated triumphs.

Whether scavenging solo or leading guild expeditions, these tools adapt to your playstyle. VIP features like cross-device sync ensure your progress never stalls – plan routes on lunch breaks, then execute them flawlessly at home. Survival here isn’t just about endurance; it’s about making the harsh world work for you.

Remember: the most successful explorers balance preparation with flexibility. Bookmark key locations, but stay ready to pivot when storms erase paths. With smart systems and teamwork, even the deep desert becomes a playground for the prepared.

FAQ

How do I track enemy camps or PvP zones?

Use the marker system to highlight hotspots like Hagga Basin or Harko Village. Filters let you toggle between threats, resources, and dynamic events for real-time navigation.

What tools help locate rare crafting materials?

Activate item-to-container search to pinpoint jasmium crystals or carbon ore. The map highlights caves, shipwrecks, and testing stations where rare items spawn.

Can I mark bases or outposts for my group?

Yes! Whiteboard mode lets teams share notes, tag safe zones, or plan raids. Sync with the companion app to update locations like Imperial testing stations across servers.

Are there hidden areas in the deep desert?

Absolutely. Explore unmarked caves, spice fields, and crashed ships using terrain scans. Regions like the deep desert often hide unique loot tied to dynamic weather events.

How do I avoid overcrowded resource nodes?

Filter by server population and set alerts for iron ore or copper ore deposits. The map’s real-time updates show player activity near trading posts or agave seed clusters.

What VIP features enhance map navigation?

Premium tools include 3D pathfinding, enemy camp timers, and exclusive markers for basalt stone veins. These integrate with in-game vehicles for faster travel across Arrakis.