
Mastering survival in Dune: Awakening begins with conquering Arrakis’ merciless sands. This alien world tests players through extreme heat, unpredictable terrain, and lurking predators that punish careless explorers. Every journey demands smart preparation – one wrong step could mean losing critical gear or facing permanent consequences.
New survivors often underestimate the dual threats of environmental hazards and resource scarcity. Water evaporates faster than hope under twin suns, while shifting sands hide dangers ranging from sinkholes to territorial creatures. Strategic planning separates thriving adventurers from those swallowed by the dunes.
This guide reveals proven methods to navigate Arrakis efficiently. Learn to interpret wind patterns, identify safe pathways, and conserve supplies during extended expeditions. We’ll break down risk-reward calculations for scavenging missions and explain how to avoid attracting unwanted attention from below.
Key Takeaways
- Preparation determines survival odds in extreme conditions
- Environmental hazards cause rapid resource depletion
- Permanent gear loss raises stakes for every decision
- Efficient routing maximizes exploration opportunities
- Advanced techniques build on core traversal skills
Preparation: Gathering Essential Gear and Resources
Neglecting resource gathering turns Arrakis from challenge to death sentence. Smart explorers prioritize three categories: emergency hydration, injury management, and vehicle construction. Every choice here directly impacts your survival window when the twin suns blaze overhead.
Identifying Vital Equipment and Materials
Start with a corpse blood extractor – your emergency hydration lifeline. This grim tool lets you harvest moisture from fallen creatures when canteens run dry. Pair it with health kit components like sterile cloth and antiseptic paste. Pro tip: Craft two extra kits for unexpected sandworm encounters.
Stocking Up on Water and Copper Resources
Fill every container before leaving base. Use layered storage – drink from skins first, save sealed jugs for crises. For mobility, gather 50+ refined copper ore chunks. Search rocky outcrops near dawn when metal deposits glint faintly. Don’t forget Advanced Servoks – these rare engine parts spawn near abandoned mining camps.
Organize supplies using a tiered system: immediate needs up front, vehicle materials secured in pack corners. This setup lets you grab essentials mid-sprint when sandstorms appear on the horizon.
Understanding the Harsh Desert Environment
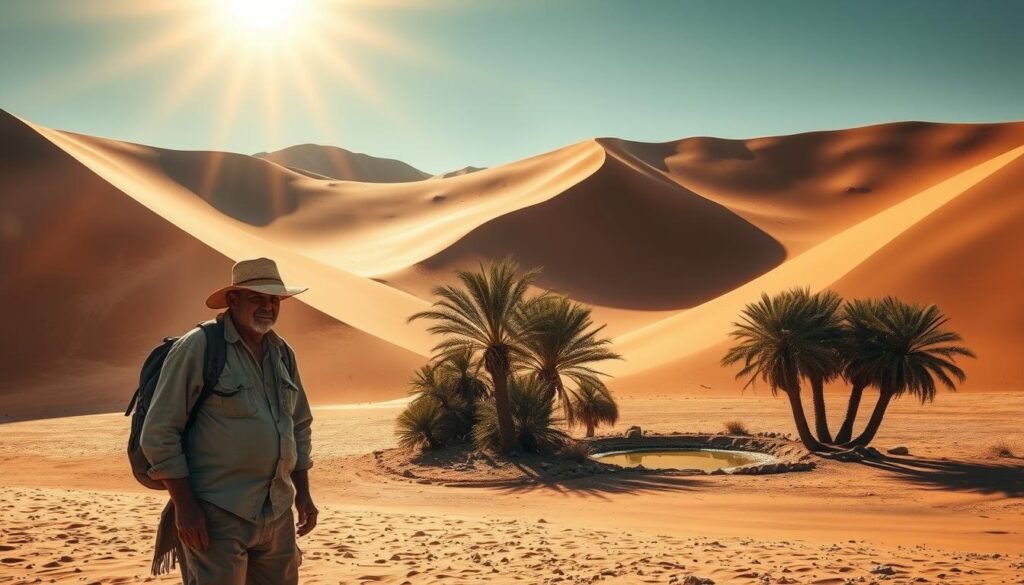
Arrakis’ twin suns don’t forgive mistakes, making shade your greatest ally. Survival here hinges on reading the landscape like a map – every rock formation and shadow tells a story. Heat management isn’t optional; it’s the difference between scavenging precious resources and becoming one yourself.
Staying in the Shade and Avoiding Sunstroke
Direct sunlight drains hydration 40% faster than shaded areas. Prioritize routes with natural cover – sandstone overhangs and canyon crevices offer safe passage. Cave networks provide extended relief, but watch for territorial creatures lurking within.
Timed movements matter. Plan expeditions during cooler hours when shadows stretch longest. Use this simple rule: if your character’s shadow appears shorter than their height, seek cover immediately.
| Shade Type | Protection Level | Water Loss Rate |
|---|---|---|
| Rock Overhangs | High | 0.8L/hour |
| Fabric Canopies | Medium | 1.2L/hour |
| Natural Caves | Maximum | 0.5L/hour |
Even with the Stillsuit in Awakening, hydration levels plummet under open skies. Pro tip: Scan horizons for telltale dark patches – these often signal sheltered zones. Memorize three backup shade locations along your route before departing.
Environmental awareness becomes instinctual with practice. Notice how light angles shift between dawn and midday. What appears safe at sunrise might become a death trap by noon. Adapt your path like the dunes themselves – constantly, but with purpose.
How to Walk Across the Desert Dune Awakening
Survivors who thrive on Arrakis dance between danger and opportunity through smart scheduling. Night becomes your closest ally when covering vast distances – cooler temperatures let you conserve water while avoiding predators drawn to daytime heat. Establish a reliable pattern: explore under starry skies, then retreat to shelters when twin suns rise.
Blueprint for Successful Expeditions
Map your route using three-phase navigation. First, mark resource-rich zones and shaded rest stops. Next, calculate water needs plus 20% buffer for detours. Finally, identify escape paths from each checkpoint. “A plan without alternatives becomes a death warrant when sand shifts,” seasoned players warn.
Nocturnal movement offers dual advantages. You’ll spot bioluminescent markers invisible by day while conserving stamina. Pack light but smart – prioritize multi-use items like foldable moisture traps that serve as emergency signals.
Daylight hours transform into crafting opportunities. Use this time to:
- Convert scavenged materials into upgraded gear
- Analyze terrain scans for future routes
- Repair equipment before nighttime departures
Always prepare contingency kits containing quick-deploy shelters and instant hydration pellets. These compact lifesavers weigh less than 0.5kg but can extend survival windows by crucial hours when storms hit unexpectedly.
Mastering Movement and Traversal Techniques
Movement defines survival on Arrakis more than brute strength. Seasoned explorers combine specialized abilities with environmental awareness to outpace dangers. This section reveals techniques that turn shifting sands into navigable pathways.

Leveraging Bene Gesserit Sprint Skills
The Bene Gesserit’s Bindu Sprint (Q key) reshapes early-game exploration. This burst of speed lets your character vault across hazardous stretches in seconds. Though it generates wormsign, proper timing ensures you reach rocky outcrops before threats surface.
Practice activating the sprint as your feet touch sand. This minimizes exposure while maximizing distance covered. “Treat each dash like a calculated gamble,” veteran players advise. Use it between elevated terrain points where vibrations dissipate faster.
Dodging Sandstorms and Sandworm Threats
Sandstorms create chaotic opportunities. Reduced visibility hides your movements from enemies but demands sharp directional awareness. Listen for low-frequency rumbles indicating approaching sandworms – these predators strike fastest during turbulent weather.
Develop a three-step response system:
- Scan for nearest shelter within sprint range
- Activate Bindu ability if vibrations intensify
- Deploy decoy items when evasion isn’t possible
Remember: sprinting during storms risks attracting multiple threats. Balance urgency with caution, reserving energy for critical escapes. Pair these skills with terrain knowledge to create escape routes that leave predators chewing empty air.
Utilizing Vehicles and Respawn Tactics for Safe Travel
Smart explorers transform Arrakis’ endless sands into manageable pathways through mechanical mastery. While survival gear keeps you alive, mobility tools determine how much ground you can cover before the environment claims its toll.
Researching Sand Bikes and Respawn Beacons
Prioritize sand bike blueprints immediately after unlocking them. These two-wheeled marvels consume refined copper ore and Advanced Servoks – gather these materials during dawn scavenging runs. Veteran players emphasize: “A functional bike triples your exploration radius before needing water refills.”
Respawn beacons offer risk-reward navigation. Craft several using base resources and plant them at:
- Resource-rich zones
- Sheltered rest stops
- Strategic vantage points
Managing Equipment and Avoiding Gear Loss
Teleportation via respawn menu cleanses your inventory – store rare components at base storage before activating. Carry only disposable gear during beacon jumps, like basic repair kits and spare fuel cells. This strategy minimizes losses while maintaining rapid transit capabilities.
Balance vehicle use with manual exploration. Sand bikes attract vibration-sensitive predators if overused in soft dunes. Alternate between mechanical speed and silent foot travel to maintain the element of surprise against Arrakis’ hidden threats.
Strategic Base Building and Efficient Route Planning
Establishing a stronghold on Arrakis requires understanding its geology as much as its dangers. Rock formations become lifelines – stable ground for structures and natural barriers against predators. Smart base building turns survival into domination.
Choosing Ideal Base Locations on Rocky Terrain
Sandworms ignore stone but devour anything on dunes. Scout elevated plateaus near resource clusters. The Haga Basin South trade post offers perfect positioning – close to copper deposits and emergency supplies.
Consider these factors when claiming land:
| Location | Resources Nearby | Safety Rating |
|---|---|---|
| Haga Basin South | Copper, Water | 9/10 |
| Imperial Testing Station | Advanced Parts | 7/10 |
| Alion Wreck | Scrap Metal | 8/10 |
Mapping Resource Outposts and Trade Posts
Create a map network connecting three types of stops: supply caches, shaded rest areas, and outposts. Mark routes using rock formations as stepping stones. This “island hopping” method reduces sand exposure by 60%.
Update your charts after each sandstorm. Wind shifts alter dune patterns, creating new shortcuts or hazards. Veteran builders recommend carrying two maps – one for planned routes, another for real-time adjustments.
Water Management and Survival Tips
Managing hydration efficiently separates survivors from casualties on Arrakis’ scorching plains. While flashy gear grabs attention, seasoned explorers know water carriers often determine mission success. These humble containers become lifelines when temperatures spike or detours stretch supplies thin.
Using Carriers and the Liquid of Last Resort
Prioritize researching portable reservoirs early – they hold 3x more than basic canteens. Craft them using polymer scraps found near wrecked harvesters. “Carriers let you play the long game,” veteran players note. Always carry two: one for drinking, another as emergency reserve.
Blood consumption should remain a final option. While corpse moisture extraction prevents immediate death, it reduces maximum health by 15% for six hours. This penalty stacks with each use, creating vulnerability during critical moments.
Track consumption patterns using your inventory screen. Sprinting under twin suns drains reserves fastest – plan shaded rest breaks every 20 minutes. Spot natural sources like dew flowers near rock formations. These glowing plants replenish 0.5L when harvested at dawn.
Advanced management involves calculating needs:
- Base rate: 1L per hour
- Add 0.3L for sprinting or combat
- Subtract 0.2L in shaded caves
Update your route when reserves dip below 40%. Detour to marked water stations or risk becoming another cautionary tale in the sands.
Tactical Climbing and Overcoming Natural Obstacles
Vertical mastery unlocks Arrakis’ hidden potential. While most focus on horizontal travel, smart explorers conquer cliffs and plateaus to gain tactical advantages. Elevated positions reveal secret paths and shelter opportunities invisible from ground level.
Scaling Rock Formations and Discovering Caves
Sandstone ridges offer secure handholds for methodical ascents. Scan for moss-like growths – these often mark stable climbing routes. Hidden caves frequently appear behind weathered outcrops, providing rare safe zones with natural water collectors.
Access these shelters by testing footholds in zigzag patterns. Keep three contact points while climbing – two hands and one foot, or vice versa. Sudden drops demand quick thinking: deploy emergency anchors if your grip falters.
Mitigating Fall Damage With Suspensors
Anti-gravity devices transform risky jumps into controlled descents. Suspensor belts activate mid-fall, reducing impact damage by 80%. Pair them with roll maneuvers upon landing to avoid twisted ankles.
For late-game explorers, Emperor Wings offer permanent slow-fall capabilities. This rare upgrade lets you glide between peaks, though fuel management remains crucial. Always carry repair kits – one malfunction at height could end your expedition.